
Find a plumber near you

We're Available 24/7! (360) 610-7901

Toilet Weak Flush: Causes & Fixes

At Full Speed Plumbing, we understand the frustration that comes with a weak flushing toilet. It’s not just about the inconvenience but the potential water wastage and plumbing issues it could lead to.

Imagine you press the flusher, and instead of a swift whoosh of water clearing everything out, you’re left with a weak swirl that barely does the job. It’s enough to make you sink (pun intended!) in despair.  

But don’t worry! 

In today’s article, we’ll guide you through the possible causes and fixes for this common household annoyance. So, let’s dive right in and navigate the waters of toilet plumbing together!

Decoding the Flush System

At Full Speed Plumbing, we believe an efficient flushing system is the heart of a clean and sanitary bathroom. So, to tackle the issue of a weak flush, let’s first understand the intricacies of the flush mechanism.

The flush system comprises an assembly of components functioning in harmony to generate strong water flow. These parts include the storage tank, flapper, valve, and float:

  • The storage tank is the reservoir where water is held in readiness for the flushing process.
  • The flapper is a rubber component that lifts when the flush lever is used, permitting the water from the storage tank to rush into the toilet bowl.
  • The valve, also referred to as the flush valve or flush ball, regulates water flow and seals the tank post-flush. It ensures water is retained in the tank until the next flush is triggered.
  • The float, generally a plastic or rubber ball, controls the water level in the tank. It drops as the water level lowers during a flush, signaling the fill valve to refill the tank.

However, various issues can impede the flush mechanism and result in a weak flush. These issues could involve a deteriorated flapper, malfunctioning valve, toilet trap clog, or insufficient water level in the storage tank. Proper identification of these problems is the first step towards effective problem-solving and implementing the most suitable remedies.

Identifying the Source of Inadequate Flush Power

Navigating the complexities of an underperforming toilet flush can seem daunting, but comprehending the potential causes makes finding a solution significantly more manageable. 

Here are a few typical factors that might be weakening your flush:

  • Accumulated Minerals: Mineral deposits in the bowl or flush mechanism can gradually obstruct water flow, leading to a weakened flush.
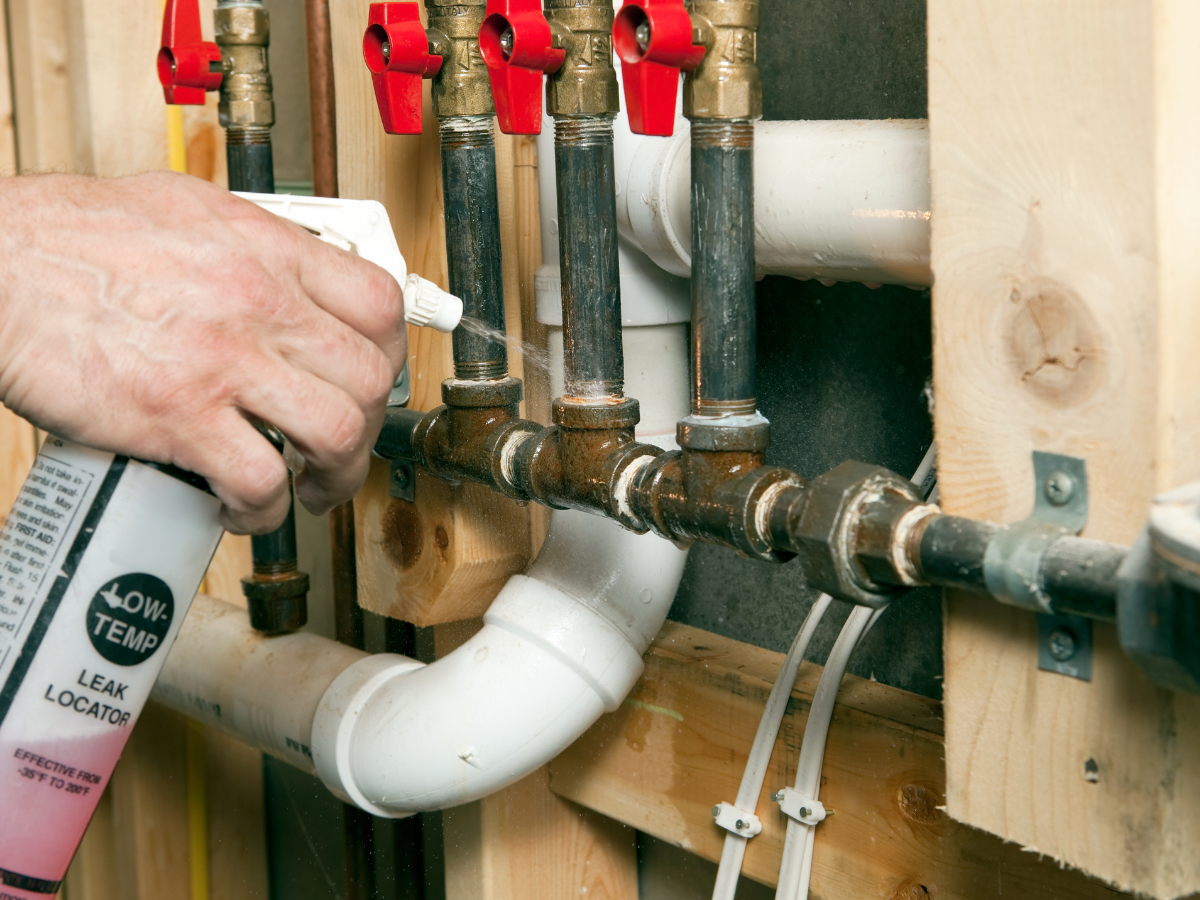
  • Substandard Water Pressure: If your plumbing system suffers from low water pressure, this can inhibit the efficacy of your toilet’s flush.
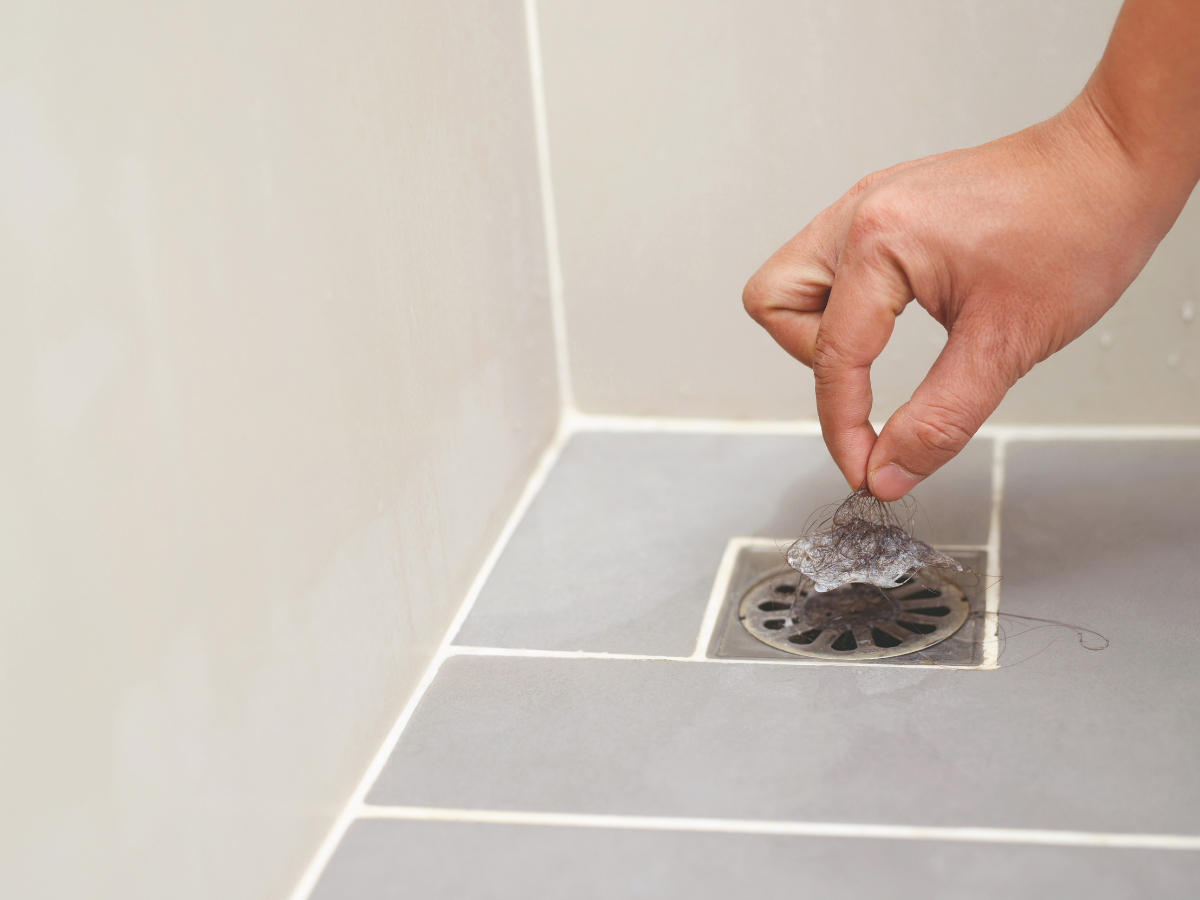
  • Obstruction in Plumbing Vents or Waste Lines: An obstructed plumbing vent or wastewater line can compromise flush power.
  • Faulty Components: A deteriorating toilet flapper or a malfunctioning valve can impede water flow, weakening the flush.
  • Inadequately Filled Tank: A tank with insufficient water can lead to an ineffective flush.
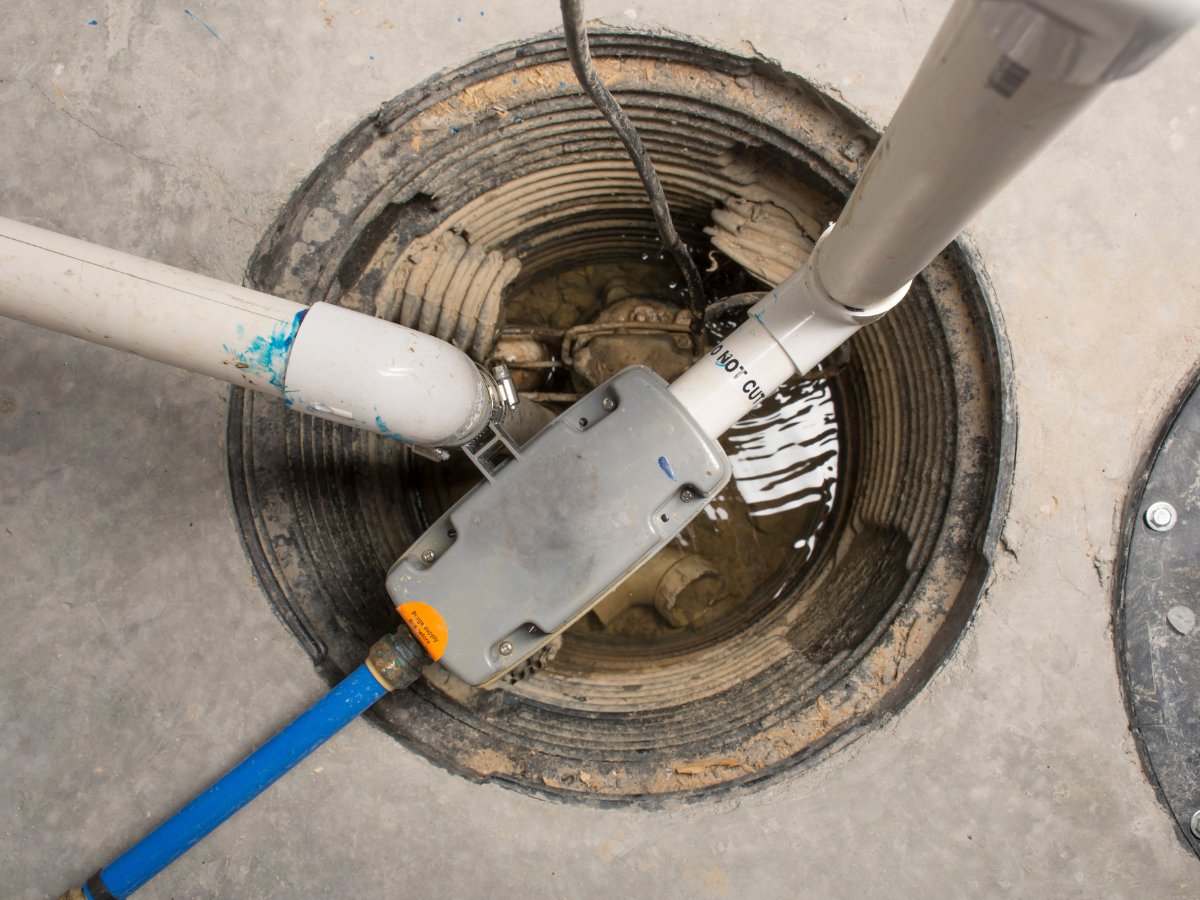
  • Septic System Complications: Any issues with your septic system, such as blockages or backups, can severely impact your toilet’s flush capability.


A handyman acquainted with these common issues can help you pinpoint the specific cause of the weak flush. Once identified, you’ll be better equipped to use effective troubleshooting methods and determine if spare parts are needed. 

Whether the solution involves adjusting the water level in the tank, clearing blockages from the sewage line, or replacing a faulty flapper, knowing the root cause is instrumental in restoring your toilet to optimal functionality. 

In the following section, we’ll delve further into various troubleshooting methods and provide a strategy to effectively tackle these issues without having to rip up your floor!

Troubleshooting Weak Flush Issues

Dealing with a weak flush doesn’t have to be a nightmare. Here’s a step-by-step guide to help you conquer the common issues outlined above:

  • Addressing Mineral Accumulation: Use a commercial cleaner to dissolve mineral deposits. Remember to follow the instructions on the product to ensure safety and effectiveness.
  • Managing Low Water Pressure: You might need to consult a plumber to investigate if the low pressure is a house-wide issue or isolated to your toilet. They can make necessary adjustments or recommend replacements.
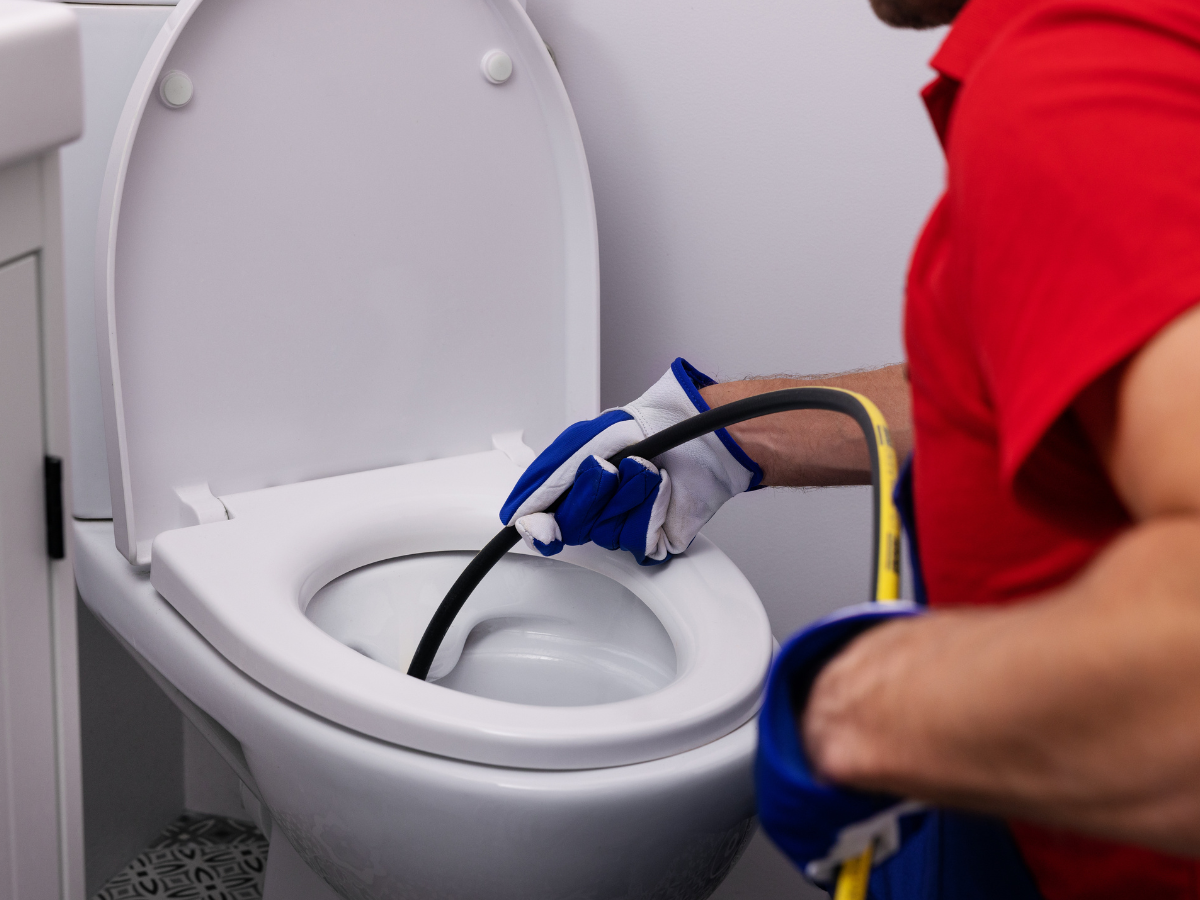
  • Clearing Plumbing Vents or Waste Lines: A plumbing snake can be used to clear any obstructions in the vent or waste lines. For major blockages, a professional plumber’s assistance would be advisable.
  • Replacing Faulty Toilet Components: If the toilet flapper or valve is defective, consider replacing these parts. Most hardware stores stock these items, and many include instructions for installation.
  • Adjusting the Water Level in the Tank: Check your toilet tank’s water level. If it’s too low, adjust the float to increase the water level until it’s about 1 inch below the overflow tube.
  • Addressing Septic System Issues: Problems with the septic system usually require professional help. If you suspect an issue with your septic system, contact a professional promptly.


Remember, while tackling these issues yourself can be cost-effective, there’s no substitute for professional help when needed. If you’re unsure about any step, it’s better to consult with a professional plumber to avoid further complications.

Toilet Weak Flush: Causes & Fixes — Conclusion

In conclusion, a weak toilet flush can be more than just an inconvenience; it can compromise the sanitation and efficiency of your bathroom. However, with Full Speed Plumbing’s comprehensive guide, you’re equipped to address and remedy common weak flush issues. 

Whether it’s mineral accumulation, faulty components, or septic system complications, most of these problems can be tackled efficiently with the right knowledge and tools. Nevertheless, DIY solutions, though cost-effective, have their limitations. Don’t hesitate to seek professional help from Full Speed Plumbing for more complex issues to ensure your plumbing system operates at peak performance. 

Remember, our expert maintenance services are only a call away, and our professionals are ready to assist you, ensuring your toilet functions optimally and your peace of mind is restored. 

Do you have questions about our services? Contact us today for more information, and let Full Speed Plumbing be your solution for maintaining your home’s efficiency.

Hydro Jetting vs Snaking: Which One Is The Best For You?

Are you facing a tough time with a stubborn clog in your plumbing system? 

Don’t sweat it; Full Speed Plumbing is here to guide you through it! 

We know cleaning a clogged pipe isn’t the most thrilling task on your to-do list, but we’re here to make it easier. In the world of plumbing, there are two heavy hitters when it comes to clearing clogs – hydro jetting and snaking. 

Both have their strengths, but knowing which one’s the best fit for your situation can be a game-changer. Let’s dive in and explore these two methods so you can return to free-flowing water in no time.

Exploring the Methodology of Hydro Jetting

Hydro jetting emerges as an invaluable procedure as you navigate the task of preserving a healthy plumbing system. This high-intensity water cleaning strategy refreshes your pipes, restoring them to optimal condition.

The Technicality and Procedure

Hydro jetting requires specific apparatus to execute a potent water flow, effectively eliminating persistent residues, grease, and mineral deposits from your pipes. This comprehensive cleaning process leaves no stone unturned.

The methodical approach to hydro jetting commences with examining the blockage or accumulation. Upon identification, a high-pressure water outflow is directed into the pipe, ranging between 1,500 to 4,200 PSI, providing a forceful discharge that clears all hurdles. The specialized nozzles are engineered to redistribute the water in various directions, guaranteeing a meticulous cleaning of the entire pipe interior.

Hydro jetting has become the preferred choice for large-scale obstacles and heavily soiled pipes thanks to its efficacy in removing even the most obstinate clogs.

Advantages of Hydro Jetting

Some of the advantages of hydro jetting include the following:

Thorough Cleansing

Hydro jetting outshines in eliminating debris, grease, and mineral deposits that accumulate over time. Unlike other methods, hydro jetting doesn’t just fragment the clog, it ensures a meticulous cleaning of the entire sewer pipe, reducing the likelihood of re-occurrence.

For large-scale obstacles and pipes hindered by tree roots, hydro jetting provides an inclusive solution, keeping your plumbing system unobstructed.

Flexibility and Extent

Hydro jetting is a flexible solution capable of obliterating clogs in diverse pipe sizes and materials. Irrespective of your pipe’s make—be it PVC, cast iron, or clay—hydro jetting effectively removes stubborn blockages.

Further, hydro jetting is perfect for extended pipe runs and heavy commercial applications. Its high-pressure water can infiltrate deep into the system, clearing away obstructions that would be inaccessible for other methods.

Eco-Conscious

A significant advantage of hydro jetting is its eco-friendly approach. In contrast to other drain cleaning techniques that depend on potent chemicals, hydro jetting utilizes water as its primary tool. This implies that no harmful substances are released into the environment, making it a sustainable choice for drain cleaning.

Disadvantages of Hydro Jetting

Despite hydro jetting’s efficiency, there are certain restrictions to consider. The intense water pressure used in hydro jetting could potentially inflict damage on fragile pipes or weak joints. Therefore, it’s crucial to assess the condition of your pipes before resorting to hydro jetting.

Moreover, hydro jetting may not be suitable for certain situations where high-pressure water usage is inadvisable. In such instances, other drain cleaning alternatives, such as snaking, may be more suitable.

Utilizing Drain Snakes

At Full Speed Plumbing, we deploy an array of proven solutions to deal with the common issue of drain clogs. Among these, the drain snake or drain auger stands out as a widely adopted tool. This flexible metal wire with a coiled ending, the auger, is maneuvered into the drain to disintegrate and extract obstructions.

How it Works

The process of operating a drain snake is relatively straightforward. The auger is guided into the drain until it encounters the blockage. Upon contact, the operator turns the handle, causing the auger to rotate and fragment the blockage. This rotation also ensnares any detritus, facilitating its extraction from the drain.

If you wish to utilize a drain snake to clear a blockage, here is a step-by-step guide:

  • Insert the auger gently into the drain, applying steady pressure.
  • Keep pushing the auger into the drain until you encounter resistance or obstruction.
  • Turn the handle clockwise to initiate the auger’s interaction with the obstruction.
  • Apply mild but consistent pressure while rotating the handle to disintegrate the blockage.
  • Once you’ve successfully cleared the blockage, gradually withdraw the auger from the drain, ensuring you pull out any debris in its path.
  • Properly dispose of the extracted debris to prevent future blockages.

Advantages of Using a Drain Snake

Some of the advantages of using a drain snake include:

Economic Efficiency

The drain snake offers an economical solution for residential users encountering drain blockages. The cost of procuring or renting a drain snake is typically lower than that of professional plumbing services. Furthermore, the ability to deal with minor blockages independently can lead to substantial savings over time.

DIY Compatibility

Operating a drain snake is generally straightforward, making it a viable DIY solution for clearing minor blockages. With some foundational knowledge and adherence to safety precautions, you can effectively deal with simple blockages without professional intervention. However, it’s crucial that you abide by safety guidelines and operational instructions when employing a drain snake.

Here are some safety and efficiency tips for using a drain snake:

  • Wear protective gear, like gloves and safety glasses, to prevent potential injuries.
  • Always adhere to the manufacturer’s operating instructions.
  • Begin with a manual or hand crank drain snake for more control.
  • Refrain from applying excessive force, which may potentially damage the pipes.
  • Thoroughly clean and sanitize the drain snake after each use.

Restrictions of the Drain Snake

Despite being a valuable tool for clearing blockages, the drain snake does have its limitations. One such restriction is its limited reach. The auger’s length may restrict access to blockages located deeper in the plumbing system or in difficult-to-reach areas of the pipes.

Moreover, some blockages, like heavy grease or mineral deposits, may not be effectively cleared by the drain snake alone. Such obstructions often require more formidable methods like hydro jetting to dislodge and flush them out of the system.

Hydro Jetting vs Snaking: Which One Is The Best For You? — Conclusion

Both hydro jetting and snaking have their unique advantages when it comes to dealing with stubborn drain clogs. The choice between the two will largely depend on the nature and severity of your plumbing issue. 

Remember, what works best for your neighbor might not necessarily be the best solution for you. As always, we recommend contacting a professional before making a decision. Full Speed Plumbing is always ready to assist you. 

We’re just a call away, ready to provide you with expert advice tailored to your specific circumstances. Contact us today, and let’s get your drains flowing smoothly again!

Dealing With Low Water Pressure in Your Kitchen Sink

Experiencing low water pressure in your kitchen sink can be a real dampener to your day-to-day activities. But there’s no need to worry; Full Speed Plumbing is here to guide you through this common household issue. Whether it’s washing dishes or preparing a meal, the right water pressure is crucial to make your kitchen tasks effortless. 

In this blog post, we will explore various aspects of plumbing that can affect the water pressure in your kitchen sink. 

So, sit tight and let’s dive into the world of kitchen plumbing!

What is Water Pressure and How is it Measured?

Water pressure, a commonly used term in the world of plumbing, refers to the amount of force that water exerts within your pipes. It plays a significant role in the functioning of your shower, taps, and the overall logistics of your home’s plumbing system. This force is usually measured in pounds per square inch, also known as PSI. Typical homes have a water pressure between 30 to 80 PSI.

How Does Low Water Pressure Affect Day-To-Day Life?

Low water pressure can significantly impact your day-to-day life, creating unwelcome disruptions in routine tasks. 

One of the most apparent effects is on your household hardware. Imagine the frustration of a slow-filling washing machine or a dishwasher that takes ages to complete a cycle. This inconvenience extends to your bathroom as well, with showers that trickle rather than cascade or a sink that fills at a very slow pace. 

In the basement, low pressure can affect the operation of water-dependent appliances and may even leave your laundry machine wanting more water. 

Moreover, any pipe in your home can be affected, reducing water flow. From giving your plants fresh water to washing your car, the effects of low water pressure are felt throughout your household activities, making it a critical concern requiring immediate attention.

Diagnosing the Underlying Causes of Decreasing Tap Pressure

Do you need help identifying the source of your reduced water pressure? Be sure to check out the following list of potential causes:

Obstructions and Aged Pipework

Obstructed or aged pipework, caused by debris, mineral build-ups, and rust, can significantly impact water logistics. Spotting the symptoms of obstructed or deteriorated pipework early is crucial, and problem-solving strategies may involve cleaning, repairing, or replacing your pipes.

Tap Leak

Leaks in taps can also lead to dwindling water pressure. Thus, spotting and addressing leaky taps, alongside routine tap maintenance, is highly important. 

Tap Aerator

Tap aerators, while beneficial, can cause issues if they accumulate debris. Identifying a congested or failing aerator is essential, and routine cleaning and maintenance can prevent issues from arising.

Water Supply Issues

Challenges with your water source, such as concerns with the municipal water system, can also lead to low tap pressure. Identifying signs of a community-wide low water pressure issue is necessary, and assistance from appropriate bodies may be required. Dysfunctional water pressure regulators, which are critical for maintaining consistent tap pressure, can also be a source of problems.

Incorrect Installation

Improperly installed or dysfunctional fittings can affect water pressure. Damaged pipes and incorrect pipe sizing contribute to low pressure. Ensuring proper installation and repair of fittings is necessary for optimal tap pressure.

Malfunctioning Valves

Hot/cold water blending valves regulate water temperature and pressure. However, malfunctions, clogging, or improper calibration can create challenges. Addressing these issues is vital to maintaining proper water flow.

Sediment

Sediment accumulation in the plumbing system can affect water flow and pressure. Identifying signs of sediment accumulation and using flushing or cleaning methods to remove it can help restore water pressure.

Dealing With Your Low Water Pressure

Addressing low water pressure in your home can seem like a daunting task. However, with a bit of insight and some hands-on actions, you can manage these issues effectively.

Identify the Source

Start by identifying the source of the low water pressure. This could be a result of obstructions and aged pipework, leaks, sediment accumulation, or even a malfunctioning tap aerator. Be on the lookout for signs such as slow water flow, variations in water pressure, or unusual noises in the plumbing system.

Regular Maintenance

Regular maintenance can nip potential problems in the bud. For example, a regular check on your tap for leaks, and cleaning the aerator can prevent a gradual decrease in water pressure.

Professional Assistance

In situations where the problem stems from the water supply or malfunctioning valves, professional assistance may be essential. A certified plumber or a representative from your local water authority can help identify and rectify issues linked to the municipal water system or faulty valves.

Appropriate Installation and Repairs

Finally, ensure that your fittings, including pipes and valves, are correctly installed. Any damaged pipe or incorrect pipe sizing can contribute to low tap pressure. Hiring a professional plumber for installation or repairs can ensure optimal performance.

By understanding and addressing these potential issues, you can improve the water pressure in your living space and enjoy a more efficient and satisfying use of your taps.

Dealing With Low Water Pressure in Your Kitchen Sink — Conclusion

In conclusion, tackling low water pressure in your household requires a keen understanding of the common culprits, from obstructions and aged pipework to improperly installed fixtures. 

With this guide, you are well-equipped to handle the basic DIY inspection and maintenance required to keep your water system running at full speed. However, some situations, especially those involving the main water supply or malfunctioning valves, call for professional expertise.

If the clog seems too stubborn to handle, it’s time to pick up your telephone and call Full Speed Plumbing in Mount Vernon, WA. Our team of certified professionals is ready to conduct a thorough inspection of your plumbing system and provide swift solutions that restore your water pressure. 

Letting a leaky tap or a blocked aerator take the joy out of your everyday water usage doesn’t make sense. From fixture installations to pipe repairs, we’ve got you covered. Call Full Speed Plumbing today and experience the difference in your water pressure and flow.

How to Make Your Stinky Sink Drain Smell Better

It’s a common household issue we’ve all been through – a stinky sink drain. Though seemingly trivial, maintaining a fresh-smelling sink drain is a significant aspect of a clean and healthy home environment. This unpleasant smell can be an unwelcome visitor whenever you wash dishes, brush your teeth, or simply walk by. 

But not to worry! 

In this blog post, we’ll guide you through some simple and effective steps to banish that foul odor and keep your sink drain smelling fresh. This way, you can ensure your kitchen or bathroom remains a pleasant space for you and your family. 

So, let’s dive right in!

Why Does Your Sink Drain Smell Bad? 4 Potential Causes and Solutions

There are several potential reasons why your sink drain smells off-putting. That being said, some reasons are more common than others. Some of the most common factors include:

  1. Rotten Egg Smell: This pungent odor is often caused by the presence of an excessive amount of hydrogen sulfide gas in your sink drain. This gas is produced by bacteria that feed on food debris and other organic matter in your drain. Regularly cleaning your drain with a mild cleaning solution can help prevent this buildup.
  2. Sewage Smell: If your sink smells like sewage, there might be a problem with your plumbing’s venting system. The venting system is designed to carry sewer gasses out of your home, but if it’s blocked, these gasses can seep back into your rooms. In this case, you might need to call a professional plumber to rectify this issue.
  3. Musty Smell: This mildew-like odor often indicates mold or mildew growth. If your sink doesn’t get used frequently, water can sit in the drain trap for extended periods, and when combined with warm, humid conditions, it creates an ideal environment for mold and mildew to thrive.
  4. Rancid Smell: This putrid smell usually results from rotting food particles stuck in the drain. Over time, these particles decompose and produce a foul odor. Regularly rinsing your drain with hot water can help to break down and wash away these particles.

Remember, a stinky sink drain is not just an inconvenience but can also be a sign of a more serious issue. Regular cleaning and drain maintenance can help keep these odors at bay. However, if the smell persists, it might be best to consult with a professional.

Preventive Measures for a Fresh-Smelling Sink Drain

Do you want to keep your sink drain fresh for the foreseeable future? Give these preventative maintenance tips a try:

Pouring Grease or Oil Down the Sink

It may seem harmless, but pouring grease or oil down your sink can lead to serious issues. These substances can harden and stick to the inside of your pipes, causing blockages and unpleasant odors. Instead, consider disposing of oil and grease in a sealed container in the trash.

Disposing of Food Waste Improperly

Small food scraps might slip through, but avoid rinsing food into your sink drain. Certain food items, like coffee grounds and eggshells, can stick to your pipes and create clogs. Moreover, food waste in the sink drain can decompose and smell foul. Remember to scrape plates into the trash or compost bin before washing them.

Neglecting Regular Cleaning

Just like any other part of your home, your sink drain needs regular cleaning. A simple weekly rinse with hot water and soap can go a long way in preventing odor buildup. Consider using a simple mixture of baking soda and vinegar (once per month) for a deeper clean.

Remember, prevention is better than cure. Avoiding these practices can keep your sink drain smelling fresh and functioning well. However, if you notice persistent odors despite these measures, it might be time to call in a professional plumber.

Utilizing a Drain Screen: Your Sink’s Best Friend

If you want to do your part in keeping your kitchen sink looking its best, purchasing a drain screen should be considered.

Drain screens are one of the best tools to combat foul odors and blockages in sink drains, so every homeowner should own at least one. Here’s why:

A drain screen serves as a physical barrier, efficiently trapping food scraps, hair, or other debris that might otherwise go down your sink drain. By placing one over it, these items won’t cling onto pipes inside and decompose and produce unpleasant odors – saving time and money!

Drain screens can significantly decrease the chances of clogs and blockages in your pipes, keeping water flowing freely through and improving your plumbing system’s overall efficiency and lifespan.

Installing a drain screen is a straightforward process. Simply purchase one that matches the size of your sink drain, lift off its stopper and secure the screen over it before replacing its stopper – easy!

Ensure the drain screen gets cleaned regularly to maintain its effectiveness. A quick rinse under running water should suffice, though if gunk accumulates, a soft brush and dish soap may help eliminate any buildup.

Integrating drain screens into your sink maintenance regimen will create a cleaner environment and a smoother plumbing system. It will also leave a fresh-smelling sink and plumbing system. Their simple solutions may often prove most effective.

How to Make Your Stinky Sink Drain Smell Better — Conclusion

A stinky sink drain is an all too familiar household problem that can be addressed with proper cleaning practices and preventive measures.

Knowing the potential causes and preventive strategies (like not discarding grease or food leftovers into the sink) are keys to effectively combating drain odors. Installing a drain screen provides additional benefits; this catches any items clogging the pipes while decreasing unpleasant odors. As always, professional assistance from Full Speed Plumbing will guarantee an uncontaminated and fresh-smelling kitchen sink!

Just as leftover food can clog your drain, failing to maintain proper cleanliness of your sink drain can create long-term issues. So let us help keep your kitchen sink sparkling clean, fresh, and running smoothly!

6 Steps On How to Fix A Gas Line Leak

Encountering a gas line leak in your home can be a daunting situation. Not only does it pose a potential fire risk, but it’s also hazardous to your health due to the toxic fumes. Recognizing the importance of addressing gas line leaks promptly and correctly, we’ve compiled an easy-to-follow guide to tackle this issue. 

We’ll walk you through the necessary steps on how to fix a gas line leak, ensuring you’re well-equipped to deal with such a situation. However, if you feel even a shred of doubt, don’t hesitate to seek professional help. 

Full Speed Plumbing is always ready to assist you. After all, your safety is our priority. Stay tuned; we’re about to get started!

Understanding Gas Line Leaks

Gas line leaks can be an emergency in any home’s plumbing system. A gas leak occurs when natural or propane gas escapes from its pipes into areas it shouldn’t. This may happen for various reasons, such as corrosion-filled pipes, improper connections, or accidental damage.

These leaks can be particularly hazardous as gas is highly combustible and may spark fires or explosions when in contact with sparks or open flames, as well as having long-term health implications from inhaling this harmful gas over an extended period.

Given these potential dangers, detecting and addressing gas line leaks is imperative as quickly as possible.

Possible Causes of Gas Line Leaks

There are several reasons why a gas line leak might occur in your home. Understanding these causes can help in early detection and prevention. Here are the most common culprits:

  • Corroded Pipes: Over time, gas pipes may become compromised due to environmental influences, poor maintenance practices or simply their age. Corrosion weakens them further and makes them more prone to leakage.
  • Unsecured Connections: Unfortunately, not all gas pipe installations are done perfectly, and improper fitting may result in gas escaping through loose connections and into the atmosphere.
  • Accidental Damage: Accidents like construction work, landscaping work, or home renovations may accidentally damage gas pipes, causing leakage. 
  • Natural Disasters: Events such as earthquakes or heavy storms may dislocate gas lines, leading to leakage issues.
  • Poor-Quality Pipes: Low-quality gas pipes increase the risk of leaks due to the inability to withstand constant pressure, cracking, or breaking over time.

Remember, gas line leaks pose serious threats to both you and your home. If you detect a gas leak, immediately evacuate the area and contact professional assistance directly.

Fixing a Gas Line Leak: 6 Essential Steps

If you’ve identified a gas line leak in your home, here’s a step-by-step guide to help you fix it. However, if you’re not confident in your abilities, calling a professional service provider, like Full Speed Plumbing, is always safer.

Step #1 — Turn Off the Gas Supply

The very first step is to turn off the gas supply. Locate your gas meter and turn the valve to the ‘off’ position. This will stop any further leakage and minimize the risk of fire.

Step #2 — Ventilate the Area

Open all windows and doors in your home to allow fresh air circulation. This step will help dilute the gas concentration, reducing inhalation risks and fire.

Step #3 — Identify the Leak

With the gas off, you can now try to identify the source of the leak. Apply a mixture of dish soap and water to the gas pipes. If bubbles form, you’ve found the leak.

Step #4 — Apply Epoxy

Once you’ve located the leak, clean the area around it and apply a thick layer of epoxy putty on it. Make sure the putty covers a large area around the leak for a secure seal.

Step #5 —Check for Additional Leaks

After fixing the initial leak, inspect the entire gas line for any additional leaks. Repeat steps 3 and 4 if necessary.

Step #6 — Test the Fix

Once all leaks have been sealed off, switch on your gas supply again and inspect where you applied epoxy. If no new bubbles form after applying it, the leak has likely been successfully addressed.

Remember that handling a gas line leak safely is often a complex and risky undertaking. If you feel uncertain about your ability to handle this situation on your own safely, contact a professional plumber, as your safety should always come first.

The Importance of Post-Repair Maintenance and Inspection for Gas Lines

Once your gas line leak has been repaired, it’s crucial not to become complacent. Scheduling regular post-repair maintenance calls with a professional is a judicious step for every homeowner. 

Doing this allows for constant monitoring of your gas pipes, ensuring that they remain in optimal condition and reducing the risk of future leaks. These maintenance calls can identify minor issues before they escalate, saving you from potential danger and costly repair jobs. 

Ultimately, entrusting this task to a professional adds an extra layer of safety to your home, granting you peace of mind. It ensures that the repair job has been effective and minimizes the chances of experiencing similar issues down the line.

6 Steps On How to Fix A Gas Line Leak — Conclusion

Gas leaks in your home are a serious risk that should be addressed promptly and decisively. They could result from corrosion-encrusted pipes, improperly fitted connections, accidental damage caused by natural disasters, or poor-quality pipes; whatever their source, gas leaks should always be treated as urgent matters that need urgent action to address them and ensure your family’s safety. 

Therefore, taking swift and appropriate steps to address and resolve them is imperative in protecting your and your family’s well-being.

But if ever in doubt, don’t hesitate to seek professional assistance from Full Speed Plumbing. Our top-tier service for fitting and repairing gas lines ensures your home remains safe and efficient; don’t take chances with gas leaks–trust only the best in business!

Full Speed Plumbing’s talented team members can help ensure a worry-free future. Contact us today.


4 Ways to Make Your Tap Water Taste Better

We’ve all been there – you fill your glass with tap water, take a sip, and the taste doesn’t hit the mark. 

Well, worry no more! We’re here to help you transform your regular tap water into a delightful thirst quencher. After all, staying hydrated shouldn’t feel like a chore. It’s important to remember that enjoying the taste of tap water significantly adds to your daily hydration routine. It not only quenches your thirst but also contributes to your overall well-being. 

And who better to guide you in your hydration journey than your reliable partner, Full Speed Plumbing

So, let’s dive right into the simple yet effective ways to enhance the flavor of your tap water. Stick around to the end for more helpful tips from Full Speed Plumbing. Let’s make every sip count!

The Basics of Tap Water

Before we explore how to improve the taste of tap water, let’s first understand its composition. Tap water is composed primarily of H2O but may contain minerals like calcium, magnesium, and potassium, which contribute a unique taste profile for each region’s tap water supply. You may even detect some chlorine due to water disinfection processes in certain locations.

The Health Significance of Tap Water

Tap water is more than just a thirst quencher. It plays a critical role in our overall health. Regular water consumption aids digestion, enhances skin health, regulates body temperature, and even boosts brain function. The minerals present in tap water can contribute to your daily nutrient requirements, supporting bone health, cardiovascular function, and more. 

Improve the Taste of Your Tap Water with These Nifty Tips

Tired of drinking the same old tap water? You can drastically improve the flavor by using these tips:

#1 — Activated Carbon Filters

First up on our list is the widely popular Activated Carbon Filters. These filters work wonders in improving the taste and odor of your tap water. They function by attracting and absorbing impurities from the water, thanks to their porous nature. 

Doing this effectively eliminates chlorine, sediment, volatile organic compounds (VOCs), and certain parasites from your tap water and makes it taste better overall! Remember, it’s all about improving its flavor!

#2 — Reverse Osmosis Filters

Reverse Osmosis Filters provide another method of water purification that stands out, known for removing more contaminants than any other filter available today.

Reverse Osmosis filters water through a semipermeable membrane, effectively trapping and filtering out impurities like fluoride, lead, pesticides, and more to improve its flavor and overall taste. Reverse Osmosis can drastically enhance tap water by filtering out contaminants like fluoride, lead, and pesticides from your drinking supply.

#3 — UV Filters

UV Filters have emerged as an innovative solution for water treatment. This technology uses ultraviolet light to kill harmful pathogens such as bacteria and viruses in your water without altering its flavor, taste, or color – an attractive feature if your priority is eliminating microbial contamination rather than aesthetic concerns.

Contact an experienced plumber, like one of our team members at Full Speed Plumbing, to learn more about the benefits of UV filters.

#4 — Infuse Your Tap Water for a Natural Flavor Boost

In addition to filters, infusion is another fantastic way to enhance your tap water’s taste. Infusing your tap water with fruits, herbs, or even spices improves the flavor and adds a dose of natural nutrients. You get a refreshing drink that’s a delight to your taste buds and a source of antioxidants, vitamins, and other beneficial compounds straight from nature’s pantry. 

Here are some popular flavor combinations to try if you’re into experimenting with flavor chemistry:

  • Lemon and Mint
  • Cucumber and Basil
  • Strawberry and Kiwi
  • Ginger and Orange

With these natural infusions, your tap water becomes much more than just hydration—it’s a healthful, flavorful experience.

Storing Tap Water for Enhanced Taste and Odor

For a noticeable improvement in the taste and odor of your tap water, consider storing it in glass containers. This simple yet effective method works because glass is a neutral material that does not transfer any odor or taste into the water. 

The Risks of Storing Tap Water in Plastic or Metal Containers

While plastic and metal containers may be readily available and convenient, they may not be the best options for storing your tap water.

  • Plastic containers can transfer chemicals like BPA into the water over time, especially when exposed to heat. This not only affects the taste and smell of the water but may also pose potential health risks.
  • Metal containers can also alter the taste of your water, giving it a metallic hint. Moreover, specific metal containers may rust over time, releasing substances into the water that could affect the safety and taste.

All in all, to enjoy the best taste of your tap water, opt for glass containers for storage, and always prioritize cleanliness and the right storage conditions.

4 Ways to Make Your Tap Water Taste Better — Conclusion

Tap water offers more than meets the eye. Not only is it an essential hydration source, but it can lead to healthier lifestyle choices when taken and treated correctly.

Filtrate it or add natural flavoring, there are numerous strategies available to you for improving the taste and quality of tap water.

Be sure to store it properly, ideally in glass containers, to maintain freshness and taste. By following these tips and strategies, ordinary tap water can become a delicious beverage that supports overall well-being.

6 Steps on How To Clean A Sump Pump Properly

Maintaining your home involves tasks that might seem daunting at first but are essential for the longevity of your appliances. One such task is cleaning a sump pump. 

Regularly cleaning your sump pump extends its life and ensures its functions optimally, especially during periods of heavy rainfall when you need it the most. Let’s dive into a step-by-step guide that will make this task less intimidating and more approachable, ensuring your sump pump stays clean and functions efficiently.

Understanding Sump Pumps

Your sump pump plays a crucial role in protecting your home by managing and removing excess water. It primarily functions as a “shield”, guarding your basement against the damaging effects of water accumulation. The pump is housed in a sump pit in the lowest part of your basement, and its job is to pump out any water that collects there. 

During heavy rainfalls or when snow melts rapidly, water can infiltrate your basement, posing potential risks like flooding, structural damage, and harmful mold growth. Here, the sump pump springs into action, pumping out the intruding water and directing it away from your home.

Step-by-Step Guide: How to Clean a Sump Pump

Do you want to learn how to keep your sump pump in tip-top condition? You’re in luck! Our team at Full Speed Plumbing has put together the ultimate step-by-step guide:

Step 1: Safety First

Before cleaning, remember to prioritize safety. Disconnect the sump pump from the power source to prevent any accidental electric shocks. Also, wear sturdy gloves to protect your hands from any sharp or dirty components within the pump.

Step 2: Remove the Sump Pump

After ensuring your safety, the next step is to remove the sump pump from its pit. Doing this might require careful maneuvering as you don’t want to damage any pump components. Once removed, clean the sump pit to remove any accumulated debris or sludge.

Step 3: Inspect the Pump

Inspect the pump for any visible signs of wear or damage. Check the power cord, float switch, and impeller housing. If any components look worn out or damaged, consider replacing them to ensure optimal performance.

Step 4: Clean the Pump

Thoroughly clean the pump with warm, soapy water. Make sure to rid it of any dirt, gravel, or other debris that might impede its performance. You can use a toothbrush to clean the small, hard-to-reach parts of the pump.

Step 5: Reinstall the Sump Pump

After cleaning:

  1. Reinstall the pump into the sump pit
  2. Make sure it’s positioned correctly to remove the water effectively
  3. Once it’s back in place, reconnect it to the power source

Step 6: Test the Pump

Finally, pour some water into the pit to ensure the pump works correctly. It should start automatically and begin pumping out the water; if it doesn’t, check the power source and the positioning of the pump.

Remember, while cleaning your sump pump is an essential part of home maintenance, hiring a professional plumber for a thorough inspection and cleaning at least once a year is also important. This will ensure that your pump is in optimal condition, ready to protect your home from potential water damage.

Debris and Dirt Accumulation: Common Problems and Cleaning Solutions

Sump pumps often become blocked with dirt and debris that hinder their proper operation and performance.


  1. Hindered Performance: Accumulated dirt and debris can wreak havoc with pump performance. Excessive dirt and debris clogging the components may reduce efficiency significantly and result in incomplete water removal – thus increasing your risk of water damage to your basement.
  2. Wear and Tear: Without regular maintenance, dirt and debris can quickly wear away at critical parts of a pump, such as its impeller, leading to its eventual breakdown and subsequent expensive repairs or replacement costs.
  3. Shortened Lifespan: Unclean pumps must work harder to combat any accumulation, shortening its lifespan over time.


Regular sump pump cleanings are key in effectively addressing these issues:

  1. Optimize Performance: By clearing away dirt and debris, regular sump pump cleaning ensures optimal water removal from your sump pit, safeguarding your home against potential water damage.
  2. Longevity: Regular pump maintenance helps extend its lifespan by reducing wear and tear, saving money and effort on frequent replacement costs.
  3. Preventive Maintenance: Regular pump cleaning enables you to inspect for signs of damage, replace worn-out parts as soon as necessary, and prevent unexpected breakdowns.

Best Practices for Cleaning Sump Pump Discharge Pipes

Here are some useful tips that you can use if you want to keep your sump pump’s discharge pipes clear and efficient:

  1. Regular Inspection: Regularly inspect your discharge pipes, especially during heavy rainfall or snowmelt periods. Look for any signs of blockage or damage. Early detection of problems can prevent serious issues down the line.
  2. Periodic Cleaning: Over time, sediment and debris can accumulate in the discharge pipes, impeding the flow of water. Regular cleaning helps keep the pipes clear and functioning efficiently. You can use a high-pressure water jet to effectively clean the pipes.
  3. Insulation During Winter: In colder climates, discharge pipes can freeze, blocking the outflow of water. Protect your discharge pipes from freezing temperatures by insulating them with foam pipe insulation. This will ensure the sump pump can continue to discharge water even in freezing conditions.
  4. Proper Positioning: The discharge pipe should be positioned to direct water away from your home’s foundation. Improper positioning can lead to water seeping back into the basement. Ensure the pipe is long enough and angled correctly.
  5. Installation of a Check Valve: A check valve prevents water from flowing back into your sump pit after the pump has pushed it out. Installing a check valve helps maintain the efficiency of your sump pump and reduces the risk of flooding.
  6. Minimize Pipe Turns: Every curve or turn in the discharge pipe can decrease the efficiency of water flow. By minimizing turns and bends in your discharge pipe, you can increase the efficiency of your sump pump.


Remember, while these tips can help maintain clear and efficient discharge pipes, you should seek professional help if you encounter persistent or severe issues.

6 Steps on How To Clean A Sump Pump Properly — Conclusion

As previously discussed, maintaining your sump pump and discharge pipes shouldn’t be taken for granted. Regular inspection and cleaning will significantly enhance its performance while prolonging its lifespan and helping avoid issues like clogs or wear and tear.

Full Speed Plumbing’s expert maintenance services can assist with ongoing issues or provide comprehensive maintenance so your basement remains dry. Our team can maintain all aspects of your sump pump and discharge pipe maintenance to ensure your basement stays safe from potential water damage.

Give our team at Full Speed Plumbing a phonecall, and let us handle all the complexities associated with maintaining your sump pump, giving you peace of mind in knowing that its upkeep will run smoothly.

Sewer Smell In House: Causes & Remedies

Have you ever walked into your house only to be greeted by an unpleasant sewer-like odor? Not exactly a welcome home treat, right? This standard (yet often overlooked) issue can turn your safe haven into a no-go zone. 


Understanding the causes and remedies of this sewer smell can help you reclaim the comfort of your home and avert potential health risks. 


So, buckle up as our team at Full Speed Plumbing dives into the typical culprits behind this annoying problem and explores effective solutions to get your home smelling fresh and clean again.

Sewer Gas and Its Characteristics

Sewer gas, a complex blend of toxic and non-toxic gasses, might be the unseen culprit behind the foul odor in your house. It’s produced through the decay of household and industrial waste. Annoying to the nose, it’s primarily composed of three main compounds: Hydrogen Sulfide, Methane, and Ammonia.

  • Hydrogen Sulfide causes the distinct rotten egg smell associated with sewer gas. It’s formed by bacterial breakdown of organic matter and is typically found in sewage and manure.
  • Methane, a colorless and odorless gas, is produced through the anaerobic decay of organic matter. Although not directly responsible for the smell, its high flammability makes it a safety concern.
  • Ammonia adds to the pungent smell of sewer gas. It is a product of protein decomposition in waste materials, also contributing to the overall stench.


The distinct odor of sewer gas is often associated with the presence of these gasses and can be quite unpleasant. It’s a mix of the rotten egg smell from Hydrogen Sulfide, the sharp, pungent odor from Ammonia, and mixed with other compounds. This blend creates an overwhelmingly unwelcoming aroma in your home.

Common Causes of Sewer Gas Smells in Houses

If any aspect of your home, including your basement, smells like sewer gas, the issue is likely due to one of the following causes:

  1. Dry Drain Traps: One prime suspect behind the sewer gas smell could be dry drain traps. These traps contain a small amount of water to form a seal, preventing sewer gasses from entering your home. However, if a fixture is infrequently used, the water can evaporate, letting the sewer gas escape into your home.
  2. Damaged or Disconnected Vent Pipes: Vent pipes direct the sewer gas out of your home. Any damage or disconnection in these pipes can cause the gasses to leak, contributing to the unpleasant smell.
  3. Sewer Line Blockages: Blockages in the sewer line can also cause sewer gas to backflow into the house. This usually happens when blockages prevent the sewer line from adequately draining, causing gasses to find an alternative route – your home.
  4. Faulty Plumbing Fixtures:  Poorly fitted, aged, or faulty plumbing fixtures can allow sewer gas to seep into your home. Even tiny cracks or gaps can become a pathway for these gasses, creating an unpleasant aroma.
  5. Poor Sewer System Design: Lastly, a poorly designed sewer system could also be to blame. If the system is not designed to vent sewer gasses adequately or lacks necessary traps, these odors can infiltrate your living space, turning it into an unwelcome haven for these smells.

Tips to Eliminate Sewer Smell in Your Home

Getting rid of a persistent sewer smell may seem daunting, but here are some effective strategies you can employ:

  1. Regular Plumbing Maintenance: Establish a routine of regular plumbing maintenance. Inspecting drain traps, vent pipes, and other plumbing fixtures regularly can prevent leaks or blockages that may cause sewer gas odors. Remember, prevention is often easier and cheaper than a cure.
  2. Ensuring Proper Ventilation: A well-ventilated home can significantly reduce sewer gas concentration to negligible levels. Ensure your sewer system is adequately vented, and keep windows open when possible to allow fresh air circulation.
  3. DIY Remedies: Simple home remedies can often solve minor issues. For instance, pouring water down dry drains can restore the water seal and keep sewer gasses at bay. Additionally, a mix of baking soda and vinegar can unblock minor drain clogs, preventing sewer gas backflow.
  4. Professional Assistance: If the sewer smell persists despite your best efforts, don’t hesitate to seek professional help. A qualified plumber can accurately diagnose the source of the problem and rectify it, ensuring your home returns to its former freshness.


Remember, a fresh-smelling home isn’t just enjoyable; it’s a fundamental aspect of a healthy living environment. By following these tips, you can effectively combat sewer smells and maintain the pleasant ambiance of your home.

What Are the Health Risks Associated with Sewer Gas Smells?

Exposure to sewer gas can pose several health risks, ranging from minor discomfort to serious conditions. Here are some potential health hazards:

  1. Irritation and Discomfort: Prolonged exposure to sewer gas can cause eye, nose, and throat irritation, leading to discomfort.
  2. Headaches and Dizziness: The presence of Hydrogen Sulfide and Ammonia can trigger headaches and dizziness. These symptoms often dissipate once you move to a well-ventilated area.
  3. Respiratory Issues: In severe cases, sewer gas can cause respiratory problems. Hydrogen Sulfide can impair lung function, leading to difficulty breathing, especially in people with pre-existing conditions like asthma.
  4. Fire and Explosion Risk: Methane, a primary component of sewer gas, is highly flammable. If it builds up in a confined area, it could pose a significant risk of fire or explosion.
  5. Neurological Problems: Chronic exposure to high concentrations of sewer gas can lead to more severe health problems. For instance, Hydrogen Sulfide in high amounts can cause neurological issues, including memory loss and reduced motor function.
  6. Fatigue and Nausea: Long-term exposure to sewer gas can also cause symptoms like fatigue, loss of appetite, or nausea. These symptoms are usually linked to the unpleasant smell rather than any specific toxic effect of the gasses.


Always remember that if you consistently detect a sewer gas smell in your home, it’s crucial to address the issue promptly to minimize these potential health risks. If symptoms persist, seek immediate medical attention.

Sewer Smell In House: Causes & Remedies — Conclusion

In conclusion, sewer gas smells in the home are more than just a nuisance. They pose potential health risks and can significantly impact the quality of life in your living space. Therefore, it’s essential to tackle these odors promptly and effectively. 


At Full Speed Plumbing, we’re committed to ensuring your home is a safe and pleasant environment. Whether you need routine maintenance, a comprehensive plumbing check, or immediate assistance, our team of experienced professionals is ready to help. Don’t let sewer gas odors disrupt your peace of mind. 


Contact us today and breathe easy once again.

Why Is Dirty Water Coming Out Of Your Sink?

Have you ever encountered dirty, murky water when turning on the tap for your sink? It can be alarming and confusing; yet why does this occur in so many homes? But what exactly causes this?

The culprit behind dirty water coming out of your sink can be various issues, ranging from rusty pipes to problems with your water heater. However, rest assured that a professional plumber can easily fix most of these problems.

Rusty pipes are a common cause of dirty water. Over time, pipes may corrode, causing rust to mix with your water. This discolors the water and can lead to an unpleasant metallic taste. Moreover, problems with your water heater can also lead to discolored water. Sediment buildup in your water heater can cause your hot tap water to turn a dirty brown color.

If you’re experiencing problems with dirty water coming out of your sink, getting a professional to examine the issue is essential. DIY fixes may seem appealing but often lead to more harm than good.

Dealing with dirty water doesn’t have to be a stressful ordeal. At Full Speed Plumbing in Mount Vernon, WA, our team of experienced plumbers is ready to tackle any plumbing issue you may encounter. 

Don’t let dirty water ruin your day; contact us today, and let’s get your water running clean and clear again!

4 Causes of Dirty Sink Water

Given the nature of your plumbing system and the water source, you might encounter dirty water from your sink for several reasons. Here’s a comprehensive list:

Rusty Pipes

Rusty pipes can be the primary culprit behind dirty water. Over time, metal pipes corrode, leading to rust contaminating the water supply and discoloring it with an unpleasant brown hue and metallic taste. 

If your sink’s water appears reddish-brown in color, this could be a telltale sign that your metal piping is rusting away – this may indicate an issue!

Sediment in Water Heater

Sediment buildup in your water heater may also contribute to discolored tap water. 

Over time, mineral deposits form at the bottom of its tank, which, when disturbed, can transform your hot tap water into murky brown hues – in other words, if your sink’s hot tap water appears murky while cold tap water appears clear, then sediment might be the problem!

Issues with Local Water Supply

Sometimes, the source of the problem could lie elsewhere than just in your home. Maintenance or repair work on local water lines could stir up sediment, temporarily discoloring it. You will likely receive a notification from your water provider when this occurs.

Bacterial Contamination

Dirty water may occasionally be due to bacterial contamination. A backflow issue or water source contamination could result in dangerous and dirty drinking water, particularly if your tap water has an unpleasant odor or leads to health issues like stomach upset. In these rare cases, bacteria contamination might be the culprit behind dirty and unsafe drinking water.

Please remember, if you’re unsure about the cause of the dirty water coming out of your sink drain, it’s always best to consult a professional plumber. They can accurately diagnose and resolve the issue, ensuring your water is clean and safe to use.

What Are The Risks of Drinking Dirty Water From Your Sink

Drinking dirty sink water presents several health risks that should not be underestimated. Of particular concern is the risk of ingestion of harmful bacteria or parasites, which can cause diarrhea, nausea, and stomach cramps if taken directly from a tap or other source.

Heavy metals from corroded pipes — like lead — can accumulate in our bodies over time, leading to serious health problems, including kidney damage and developmental delays in children. If water discoloration is due to rust, this could translate to high iron levels, which, while not directly harmful, could contribute to conditions like hemochromatosis among genetically predisposed individuals.

Contaminated water may contain chemical contaminants that pose long-term health risks, including cancer. Before deciding to drink the water in question, always ensure it is clear, odorless, and safe – if uncertain, contact a professional plumber or water authority for guidance.

What Can You Do If Dirty Water is Coming From Your Sink?

Though it might be tempting to attempt fixing your dirty water issue yourself, doing it without previous plumbing experience could prove costly and ineffective. Plumbing systems are intricate systems and should only be handled by certified experts.

By trying to tackle it yourself without proper experience and knowledge, attempting to resolve an issue may lead to further complications that exacerbate its severity. Instead, professional plumbing services like Full Speed Plumbing should always be your go-to option for quick solutions.

Our team is equipped with the skills, experience, and tools necessary to diagnose and resolve your plumbing problems quickly so your water runs cleanly without causing additional strain on you or creating additional stress.

Why Is Dirty Water Coming Out Of Your Sink? — Conclusion

Discolored sink water may be alarming, but it’s often indicative of common plumbing issues like rusty pipes or sediment buildup in your water heater, local supply issues or, rarely, bacterial contamination. While these issues can be alarming to witness firsthand, most can be quickly addressed by professional plumbers.

DIY solutions should always be avoided as they can often cause more harm than good. Instead, reach out to Full Speed Plumbing of Mount Vernon, WA.

Let us quickly resolve your water issues for a clean and safe supply. Don’t let dirty water ruin your day – reach out today, and let’s restore clarity and safety back into your supply of drinking water!

Why Is No Water Coming Out Of Your Faucet?

Have you ever turned on your faucet expecting an abundance of ice-cold water, only to be met with nothing at all? In such an instance, it leaves us asking the question, “Where did all that water go?”.

No water is coming out of your faucet for various reasons, ranging from minor issues like a closed valve to more severe ones that need professional assistance. Here we explore some of these possible causes that are keeping it from flowing freely into your home or business.

And remember, when in doubt, don’t hesitate to reach out to Full Speed Plumbing. Our team of seasoned professionals is just a call away, ready to restore your faucets to “full speed”!

Potential Reasons Why No Water Is Coming Out of Your Faucet

Is your faucet not working properly? Here are some potential reasons why:

  1. Closed Water Valve: When no hot water is coming from your faucet, begin by inspecting the water valve beneath your sink. If it has been turned off, this could obstruct water flow – simply turn it back on to restore its flow and restore the hot water side of your faucet!
  2. Blocked Faucet: Over time, mineral deposits can build up in your faucet and cause it to be blocked, leading to reduced or stopped up water flow. Regular cleaning can help address this problem and help ensure smooth water usage.
  3. Frozen Pipes: In colder climates, pipes may freeze over, preventing water from flowing freely through them. If this is the case for you, thawing may be required; just be wary as improper thawing may damage pipes irreparably.
  4. Corroded Pipes: Older pipes may become susceptible to corrosion, leading to reduced water pressure or complete blockage of their contents. If this is suspected, contacting a professional plumber is advised to assess and replace the affected piping as soon as possible.
  5. Plumbing Issues: Sometimes, the issue lies deeper within your plumbing system, such as leaks or blockages that limit water supply. In such instances, professional help should be sought to evaluate and fix it as soon as possible.

Steps to Take When Water Isn’t Coming Out of Your Faucet

If you’re wondering why no water is coming out of your faucet, don’t panic! Here’s a simple step-by-step guide to help you identify and address the problem:

  1. Check the Valve: When no hot water is coming from your faucet, begin by inspecting the water valve beneath your sink. If it has been turned off, this could obstruct water flow – simply turn it back on to restore its flow and restore your hot water side of your faucet!
  2. Inspect the Faucet: If it turns out the valve isn’t the issue, take a closer look at your faucet. Over time, mineral deposits can build up and block water flow – one of the main reasons why there’s no water coming out of your bathroom faucet in the first place. Regular cleaning can help avoid this situation altogether.
  3. Examine Your Pipes: In colder climates, pipes may freeze up and prevent water from flowing freely through them. If this appears to be the cause, try unfreezing your pipes carefully so as not to cause damage to them in any way.
  4. Check for Corrosion: Corrosion can also contribute to pipe blockages in older pipes, so if you detect signs of corrosion, it’s advisable to call a plumber to assess and replace your pipes as soon as possible.
  5. Call in a Professional Plumber: If the issue remains even after taking these steps, the issue could be more complex than originally suspected – leaks, deeper blockages, or problems with your water supply could all be potential causes. Consult a professional plumber for diagnosis and solutions.

Remember, addressing these issues promptly can avoid further damage to your plumbing system. Don’t hesitate to seek professional help if there’s no water coming out of your kitchen faucet!

Tips for Preventing Water Flow Issues in the Future

Do you want to future-proof your plumbing system? Here are some tips that you can use to prevent water flow issues in the future:

  • Take time to conduct regular inspections and clean your faucets; this can deter the build-up of mineral deposits that could obstruct the water flow.
  • Be proactive and keep an eye on your pipes for any telltale signs of corrosion. Early replacement of affected pipes can prevent further damage.
  • Preserve your plumbing system’s longevity by ensuring valves are turned off when they are not in use.
  • If you are living in a region with cold weather, safeguard your pipes by insulating them against freezing temperatures.
  • Thinking about installing a water heater tank could be a good move, especially if you have been contending with low water pressure. It can help maintain a steady water pressure.
  • Stay educated about the details of your home’s plumbing system and always keep open lines of communication with professional help when in doubt.

Why Is No Water Coming Out Of Your Faucet? — Conclusion

Experiencing no water from your faucet can be frustrating, yet its source needn’t remain unknown. Issues could stem from closed water valves, blocked faucets, frozen or corroded pipes and deep-seated issues in your home’s plumbing system – among many other possible culprits.

Prevent potential plumbing disasters through quick action and early diagnosis. If after taking these steps you are still suffering water leakage issues, don’t hesitate to seek professional assistance as soon as possible.

At Full Speed Plumbing of Mount Vernon, VA, our team is equipped to meet all of your plumbing needs quickly and efficiently – we know how important faucets can be! Don’t settle for slow service when Full Speed Plumbing can bring back full throttle! Don’t settle for just a trickle when Full Speed Plumbing can bring full force!

Request Service