
Find a plumber near you

We're Available 24/7! (360) 610-7901

What Causes Noisy Water Pipes After Flushing The Toilet?

Have you ever wondered why your peaceful home suddenly turns into a concert of peculiar sounds every time you flush the toilet? 

Are those noisy water pipes trying to communicate a hidden plumbing issue? 

Well, at Full Speed Plumbing, we’re here to answer the question, “what causes noisy water pipes after flushing the toilet?”. Let’s dive into the mystery surrounding the symphony that comes alive post-flush and explore the possible causes. 

Remember, understanding the problem is the first step toward finding the right solution.

Understanding the Root of the Problem: What Are the Different Noises You Hear After You Flush Your Toilet?

When you flush your toilet, you might hear several distinct sounds from your plumbing system. The most common include:

  1. Banging or Thudding Noise (Water Hammer): This typically happens when the water flowing in your pipes stops or changes direction abruptly. It’s the sound of water slamming against the pipe walls, creating a shock wave. This is also known as a “water hammer.”
  2. Hissing or Whistling Noise: Do whistling sounds come from your noisy toilet after flushing? Loud, whistling noises are usually caused by water flowing through a partially closed valve or pipes too small. This restricts the water flow, causing a whistle-like sound. In a similar vein, a hissing sound could indicate that there’s too much air trapped in the pipes.
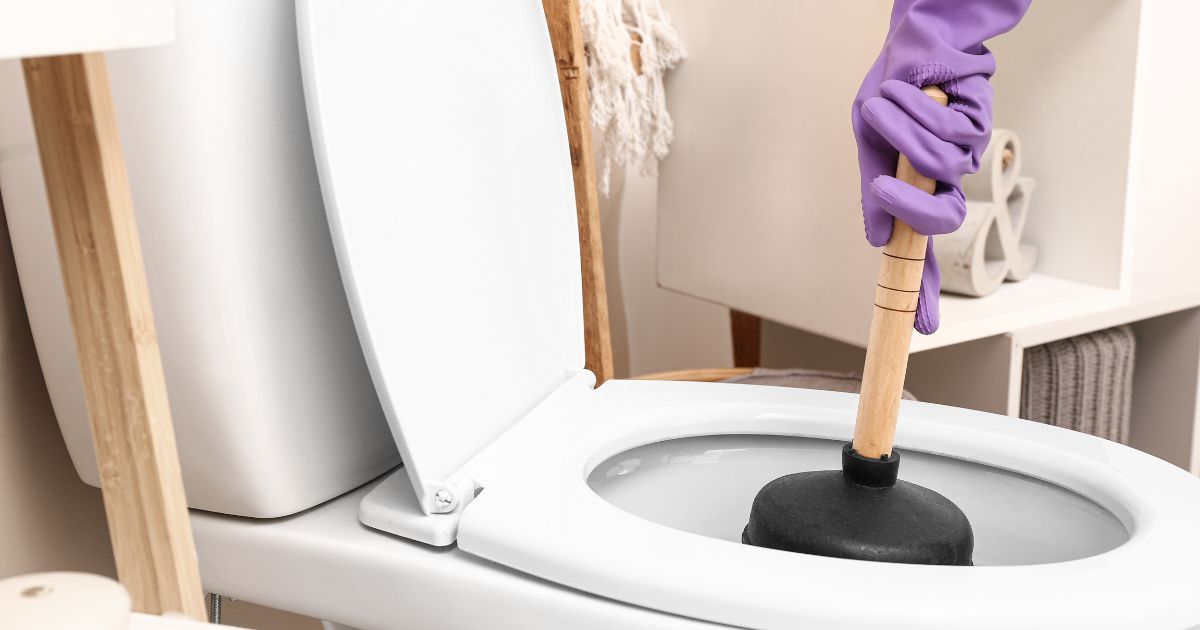
  3. Gurgling Noise: A gurgling sound after flushing usually points to a blockage somewhere in the pipes. The sound is created by water and air bubbles fighting their way past the obstruction.
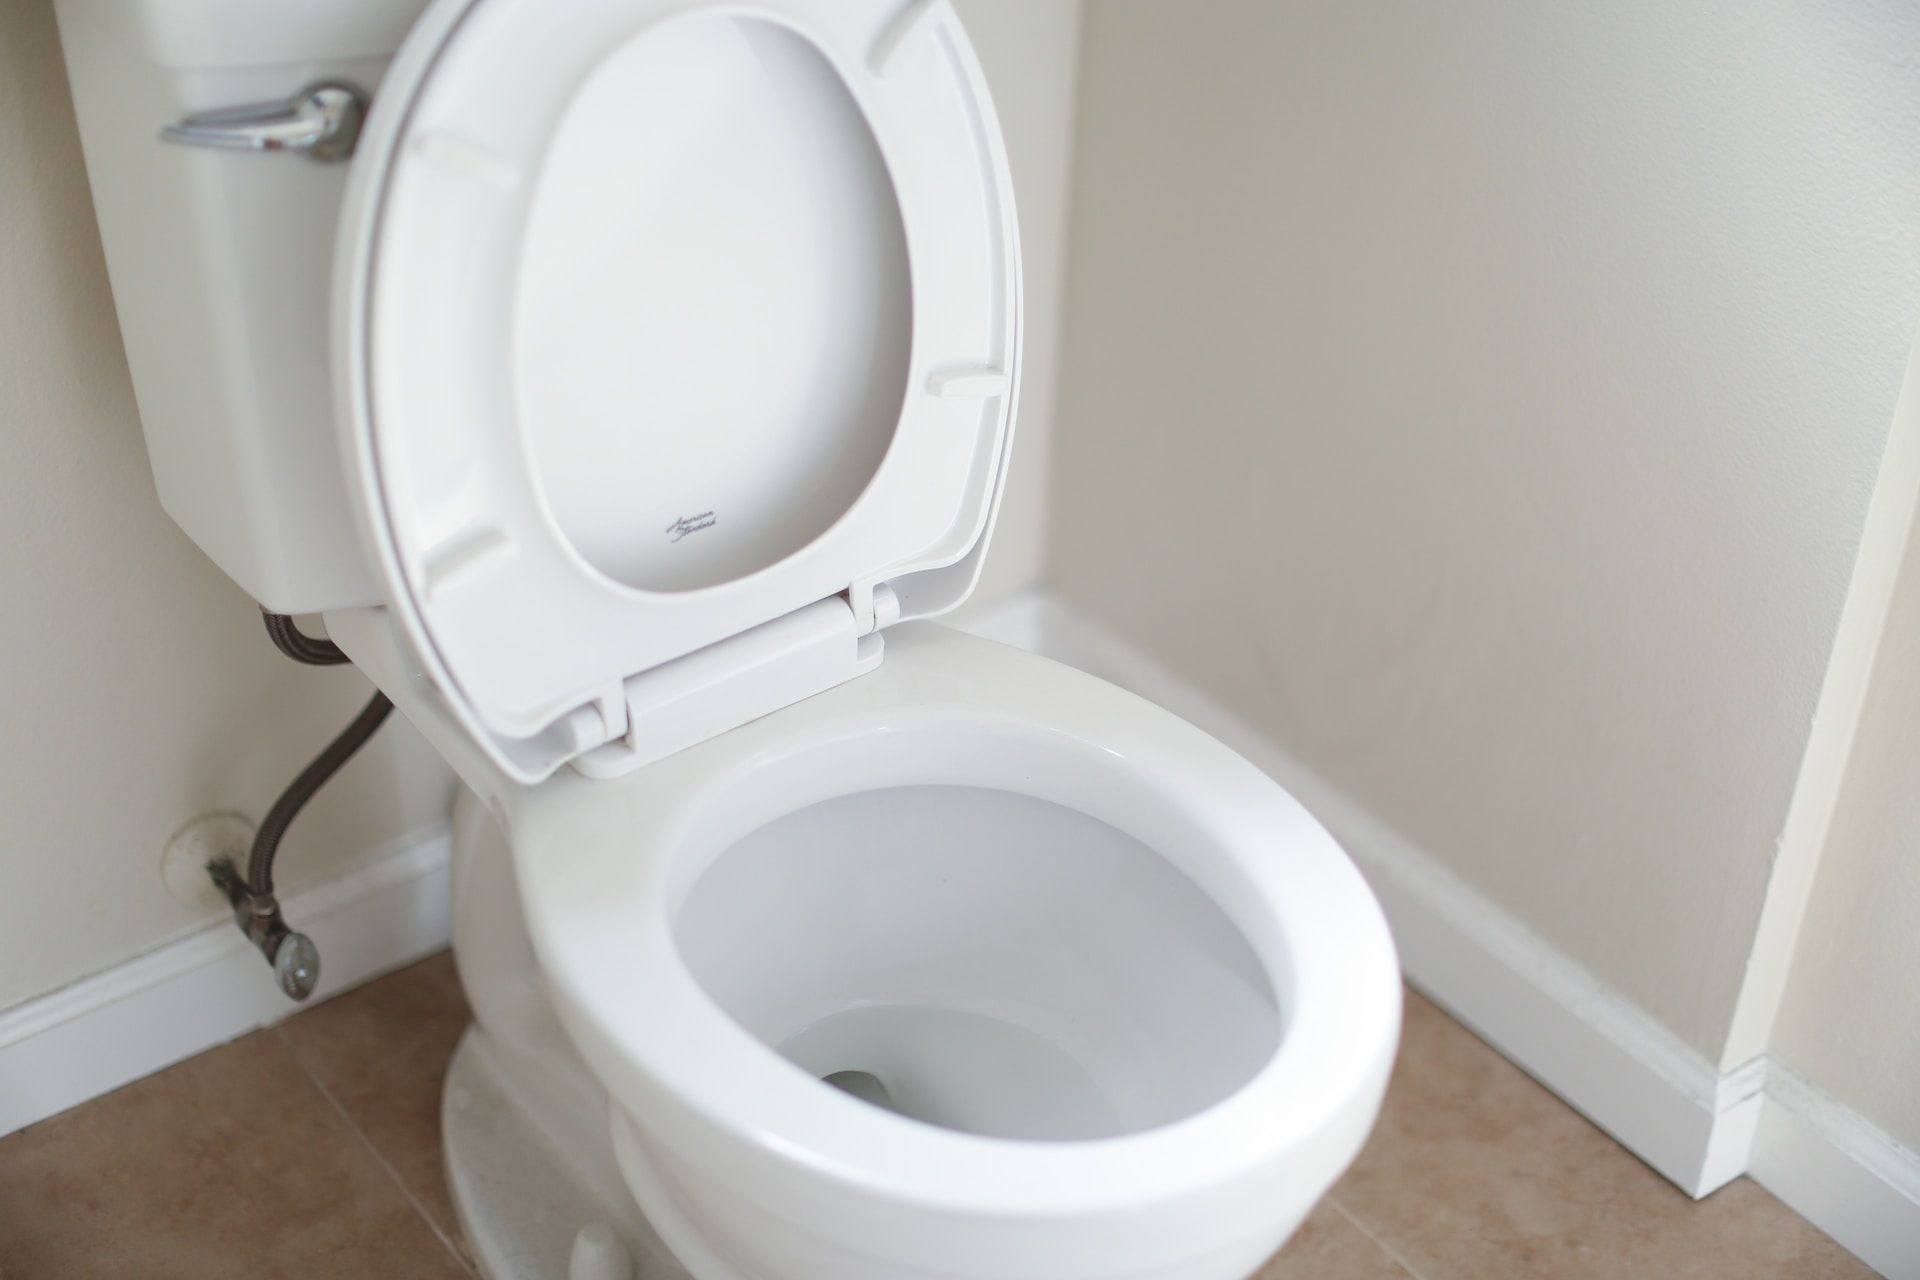
  4. Squealing Noise: When you hear a high-pitched squealing sound after flushing your toilet, it could indicate a problem with the fill valve. This usually happens when internal components of the valve become worn out or damaged. The resulting friction creates a squealing noise that can be quite startling.
  5. Constant Running Water Sound: If, after flushing, you continue to hear the sound of running water, it is likely that your toilet’s flapper valve isn’t sealing correctly. This can cause water to leak from the toilet tank into the toilet bowl, creating a constant running water sound.

Remember, each of these noises is a sign from your plumbing system that something isn’t right. Listen closely, and your pipes may just help you catch a minor issue before it becomes a major plumbing disaster.

Water Pressure Issues and Sediment Buildup: Silent Culprits Behind Noisy Pipes

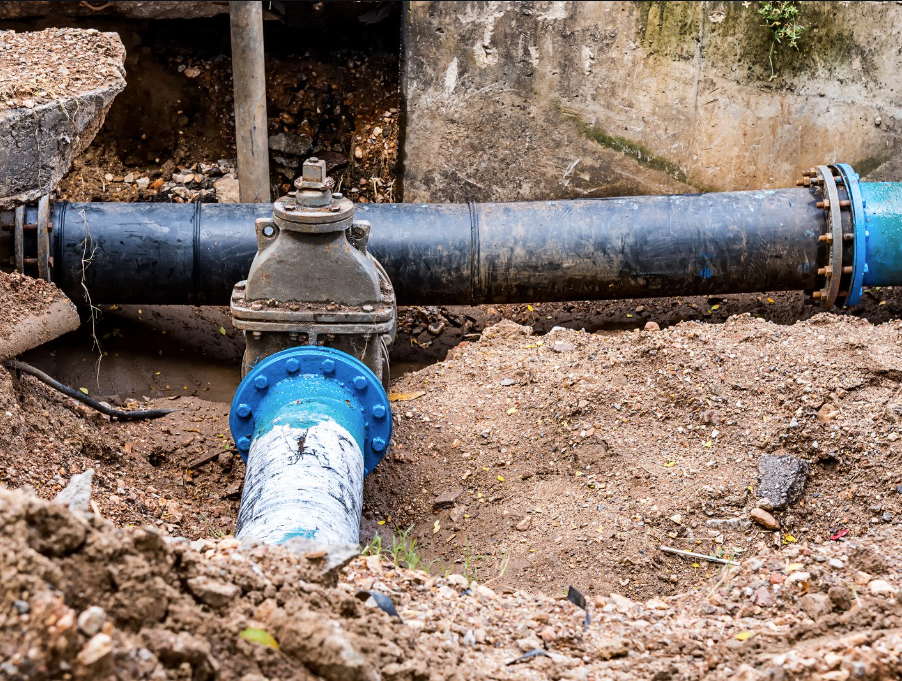
Two potential causes of noisy water pipes post-flush could be water pressure issues and sediment buildup. When your home’s water pressure is set too high, the rush of water can cause pipes to vibrate and create noise. This is particularly noticeable when a valve closes (like after flushing a toilet), which can result in the dreaded water hammer effect.

On the other hand, sediment buildup in your pipes can also lead to strange noises. Over time, minerals from the water can accumulate in your pipes, reducing the space available for water to pass through. This can intensify the noise of water flowing, sometimes leading to a whistling or hissing sound.

How to Stop Noisy Pipes When Flushing the Toilet Like an Expert

Now that we’ve identified the issues let’s talk about some preventative measures. To maintain optimal water pressure, consider installing a pressure-reducing valve or adjusting your existing one. This can help keep your water pressure within the recommended range, reducing the likelihood of pipe noise and water hammers.

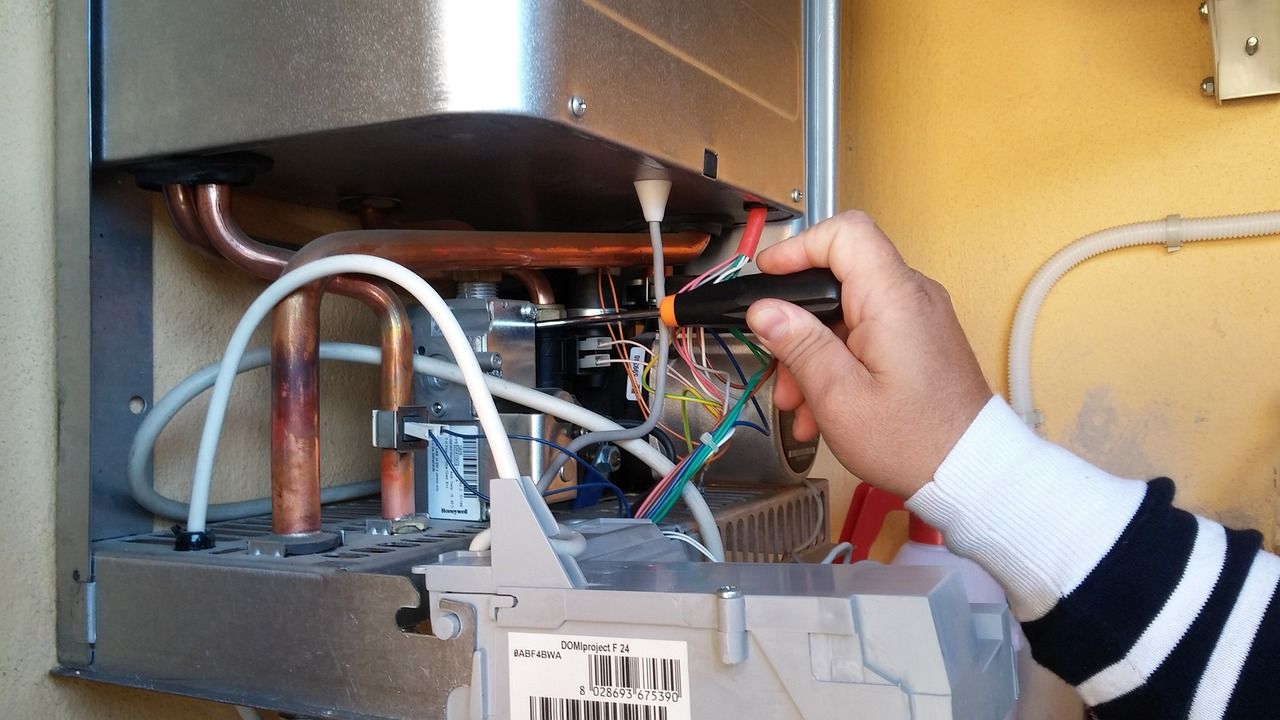
As for sediment buildup, regular flushing of your water heater and pipes can help keep them clear. You might also consider installing a water softener if your water supply is particularly high in minerals. Remember to seek professional advice before making any major changes to your plumbing system. After all, prevention is always better than cure when it comes to plumbing health.

Who Can You Call if Your Pipes Make Strange Noises After Flushing Your Toilet?

If your pipes still insist on performing their noisy symphony even after you’ve taken preventative measures, it’s time to call in the professionals. Full Speed Plumbing is your go-to resource for all toilet-related plumbing issues. Our team of skilled professionals is equipped to diagnose and resolve all your plumbing concerns, including those noisy pipes that seem to have a mind of their own after every toilet flush. 

Remember, each of these noises is a sign from your plumbing system that something isn’t right. Listen closely, and your pipes may just help you identify a small problem before it becomes a major plumbing disaster.

What Causes Noisy Water Pipes After Flushing The Toilet? — Conclusion

In conclusion, the symphony of sounds you hear from your pipes after flushing your toilet is more than just a nuisance; it’s your plumbing system’s way of alerting you to potential issues. 

From the water hammer effect to sediment buildup, understanding the root of these noises is incredibly important. Ensuring optimal water pressure and regular pipe maintenance can help keep your pipes quiet and efficient. However, if you continue to hear your noisy water pipes after flushing the toilet, it’s time to seek professional help. 

Full Speed Plumbing in Mount Vernon, WA, is here to help you restore the peace and quiet in your home. Our expert team is ready and equipped to resolve all your plumbing concerns. Don’t let the noisy pipes steal your peace. Contact us at Full Speed Plumbing today and let us tune your pipes to tranquility.


6 Telltale Signs That You Have A Broken Water Line

Have you ever faced an inexplicable surge in your water bill or noticed a suspiciously soggy spot in your yard?

You might be dealing with a broken water line. Understanding the signs of a damaged water line can save you from a lot of hassle and a potentially hefty repair bill down the line. 

Knowledge is power, and Full Speed Plumbing in Mount Vernon, WA is here to empower you. So, buckle up, and let’s dive into this crucial home maintenance topic. 

Remember, if you spot any of these signs, don’t hesitate to reach out to us at Full Speed Plumbing – your trusted partner for all your plumbing needs.

5 Common Causes of Broken Water Lines

If you suspect that your water line is broken, the damage could be due to one of the following causes:

  1. Extreme Soil Conditions: Soil conditions play a vital role in maintaining the longevity of a water line, with any major shifts leading to possible fractures or ruptures in its integrity. Heavy rainfall or irrigation could become oversaturated and exert excess pressure onto it, potentially causing it to collapse, resulting in damage being done to it.
  2. Temperature Fluctuations: Sudden changes in temperature can wreak havoc with your water line, from extreme cold causing water to freeze and expand to soil contraction, leading to cracks along its route, to extreme heat leading to soil shrinkage, which causes line breaks.
  3. Aging Infrastructure: Like everything in your home, your water line is vulnerable to wear and tear as time goes on. Over time it becomes more susceptible to leaks and breaks; regular inspection and maintenance checks can help identify a potential plumbing problem before it escalates into costly repairs.
  4. Root Intrusion: Tree roots searching for water sources may invade your water system and, over time, cause significant damage that requires professional repair to fix.
  5. High Water Pressure: While high-pressure showers may seem relaxing, too much pressure could strain your plumbing lines and potentially lead to a rupture. Regular checks on your water pressure can help protect you against this common plumbing issue.

Remember, early detection can save you time, money, and a lot of stress. Keep an eye out for these common causes of broken water lines and contact Full Speed Plumbing for any repair or maintenance needs.

6 of the Most Noticeable Signs You’ve Got a Broken Waterline

A broken water line in your home can lead to serious problems if not addressed promptly. Here are some signs to look out for:

  1. Unusually High Water Bills: A sudden spike in your water bill could be a sign of a leak or break in your water line. The excess water usage results from the water continuously flowing out of the break.
  2. Wet Spots in Your Yard: If a water line is broken and leaking, it could cause wet spots or marshy areas in your yard. This is especially suspicious if there hasn’t been any rain or watering.
  3. Low Water Pressure: A break in your water line could result in a notable drop in water pressure in your home. If your showers and faucets are only trickling, it might be time to call a plumber.
  4. Unclear or Dirty Water: Similar to the causes mentioned above, a broken water line can also lead to dirty or discolored water. This happens when dirt and other contaminants enter the water line through the break.
  5. Unusual Noises:  If you hear unusual noises, such as hissing, from your pipes, it could be a sign of a water line break. The noise is caused by the water escaping under pressure.
  6. Foundation Cracks: In severe cases, a broken water line may cause cracks in your home’s foundation. The leaking water can erode the soil beneath the foundation, causing it to shift or crack.

Once an underground water supply pipe springs a leak, it can disrupt daily routines and threaten nearby structures. Here’s a step-by-step guide on how to repair it effectively.

Step 1: Confirm the Leak

To begin any repair work, it is crucial that you first verify whether there is indeed an underground water pipe leak. Look out for signs such as soggy yards, low water pressure or an unusually high bill; these could all indicate there may be an issue with your underground pipe system. If these symptoms exist, then chances are high there’s likely a leak somewhere within.

Step Two: Locate the Leak

Once you’ve verified a leak, the next step should be locating it. This may prove challenging if your pipe runs deep underground – however, looking for wet areas in your yard could provide clues as to where the source lies.

Step 3: Excavate the Area

Once you have identified a leak, it’s time to excavate. Use a shovel to carefully excavate the area around the leak using wide enough sweeps in order to give yourself enough room.

Step 4: Repair the Water Pipe

Once the leak has been identified, it is time to repair it. Depending on its severity, a simple pipe repair clamp might do just fine – or you may require replacing an entire section of pipe altogether.

Step 5: Conduct an Additional Leak Check

Once your repair has been completed, it is imperative to conduct an additional leak test. Turn your water back on and observe if there are any additional signs of leakage; if nothing appears amiss then congratulations: you have successfully fixed your underground water supply pipe!

Step 6: Backfill the Excavated Area

To complete the excavation process, it’s time to backfill. Relocate soil into its proper places, making sure to compact it firmly before replacing grass or vegetation that was disturbed during excavation. Don’t forget to restore any that was disturbed!

DIY repair is a cost-effective way of dealing with minor leaks. But remember, it’s always wise to call in professionals like us at Full Speed Plumbing for major repairs or if you’re unsure of the repair process. Safety should always be your priority.

6 Telltale Signs That You Have A Broken Water Line — Conclusion

In conclusion, being aware of the signs of a damaged water line can save you from unnecessary stress and financial strain. From sudden spikes in your water bill to soggy spots in your yard, keep an eye out for these telltale signs. 

Factors like extreme soil conditions, temperature fluctuations, aging infrastructure, tree root intrusion, and high water pressure can all lead to a broken water line. A minor leak might be within your DIY capabilities, but for major issues or if you’re in doubt, don’t hesitate to call in the professionals. 

Here at Full Speed Plumbing in Mount Vernon, WA, we’re always ready to assist with all your plumbing needs. 

Contact us today and let us bring you peace of mind with our reliable plumbing solutions.

9 Tips on Dealing With Sewage Backup In Your Basement

Experiencing a sewage emergency in your basement can be incredibly distressing. It’s not only unsightly, but it can also pose potential health risks and damage your property. But don’t fret! If you are in this unfortunate situation, we’ve got you covered. 

Today’s blog post from our team at Full Speed Plumbing is going to arm you with helpful tips to tackle this messy problem head-on. From identifying the signs to prevention strategies to cleanup processes, we’ll guide you through each step. Stay with us, and turn this daunting task into a manageable one.

5 Causes of Sewage Backups in Basements

If you’ve recently experienced a sewage backup in your basement, you may be wondering what caused the issue. Although it’s hard to pinpoint the cause without professional assistance, one of the following issues is most likely responsible for the backup:

  1. Clogs: Much like your drain pipes, your main sewer line can also become clogged, leading to a blockage. A sewage backup in your basement floor drain can occur when items that are too large or not easily broken down are flushed down the toilet or dumped down the sink.
  2. Tree Roots: Tree roots can invade and block your sewer lines, causing a backup. They can create cracks in the pipes or grow into the pipes, leading to blockages and, eventually, backups.
  3. Damaged Sewer Lines: Old, corroded, or collapsed lines can obstruct the flow of wastewater, leading to a backup. Homes built over 30 years ago may still have cast iron pipes or clay pipes, which can break or collapse over time.
  4. Heavy Rainfall: During heavy rain, the water volume can exceed the sewer system’s capacity. The excess water can then back up into the lower areas of your home, like your basement.
  5. City Sewer Issues: If the public sewer system in your city or municipality is having issues or is under maintenance, it could lead to a backup in your basement. This is usually a problem beyond your control.

9 of the Top Tips for Dealing with Sewage Backups in Basements

Are you having a hard time dealing with the sewage issue in your basement? Feel free to try out one (or more) of the following tips:

  1. Identify the Source of the Problem: Before you start dealing with the backup, it’s crucial to identify the source of the problem. Is it a clog? Or is it due to heavy rainfall? Understanding the source can help in applying the most effective solution. For instance, if tree roots are the culprit, removing them would be the best course of action.
  2. Equip Yourself Properly: Always make sure you have the right personal protective equipment (PPE) before tackling a sewage backup. This includes rubber gloves, boots, goggles, and a mask. Remember, you’re dealing with wastewater that can contain harmful bacteria and pathogens.
  3. Switch Off Electricity: If the backup is substantial and has reached electrical outlets or appliances, switch off the electricity immediately. Water and electricity are a dangerous pair. It would be wise to consult an electrician if you’re unsure.
  4. Remove Water and Solid Waste: Once safety measures are in place, remove the water and solid waste. A wet/dry vacuum can be helpful in this situation. Dispose of the waste in accordance with local regulations.
  5. Clean and Sanitize the Area: After removing the water and waste, thoroughly clean the area using a solution of one part bleach to ten parts water. Doing this helps in eliminating harmful bacteria.
  6. Dry the Area Thoroughly: You can use fans, dehumidifiers, or heaters to dry the area completely. This helps prevent mold and mildew from forming.
  7. Inspect and Repair Damaged Items: Inspect your belongings and decide what can be salvaged. Some items might require professional cleaning. Remember to dispose of unsalvageable items properly.
  8. Prevention is Key: Once the immediate problem is addressed, work towards prevention. Regular maintenance of your sewer lines, avoiding flushing inappropriate items, and installing a backwater valve can help prevent future backups.
  9. Contact a Professional: If the problem is too large to handle yourself, or if you’re unsure about any part of the process, don’t hesitate to contact a professional plumber. They have the training and equipment to deal with sewage backups safely and effectively, ensuring your home is safe and clean. Remember, it’s always better to be safe than sorry.

Finding a Reliable Plumber That Knows How To Clean Sewage Backups in Basements

Dealing with a sewage backup is not for the faint-hearted, and it’s perfectly fine if you’re not comfortable handling it yourself. There’s no need to feel overwhelmed; professional help is just a call away. 

Numerous companies, including our team at Full Speed Plumbing, specialize in sewage issues and are equipped to handle plumbing emergencies effectively and safely. These professionals possess the required knowledge, skill set, and tools to tackle the mess, ensuring your basement is restored to its original, clean state. 

So, if you find yourself facing a sewage backup, don’t hesitate to reach out to our experts at Full Speed Plumbing.

9 Tips on Dealing With Sewage Backup In Your Basement — Conclusion

In conclusion, dealing with a basement sewage backup might appear daunting, but with our comprehensive guide, you’re well-equipped to handle it. We’ve covered everything from identifying the causes, applying practical tips, and resorting to professional help. Whether it’s a clog, tree roots, damaged sewer lines, heavy rainfall, or city sewer issues, the key lies in identifying the problem and addressing it effectively. 

Don’t forget: when the situation gets too messy, professionals are there to help. If you’re in Mount Vernon, WA, and need expert assistance, don’t hesitate to contact Full Speed Plumbing. Our team of specialists is ready to restore your basement to its clean and safe state.

Toilet Tank Leaks When Flushed: How to Fix

Have you ever experienced that annoying moment when your toilet tank leaks every time you flush? Well, don’t fret because you’re not alone. Many of us have been in the same predicament. 

Let’s get into the reasons why your toilet tank leaks when flushed and how to deal with it once and for all! 

If you find you need a bit more help, our team at Full Speed Plumbing in Mount Vernon, WA, is always ready to lend a professional hand. 

What is a Toilet Tank Leak? — An Expert Overview

In layman’s terms, a toilet tank leak is a bit like a sneaky water thief that robs your wallet without you even realizing it. 

Essentially, water seeps from the tank down into the bowl or onto your bathroom floor. This can happen for many reasons, maybe a worn-out flapper or a faulty fill valve. But whatever the cause, it’s an issue that needs to be addressed promptly. Otherwise, you might find your water bill skyrocketing, and no one wants that!  

So now that we’ve got that clear, it’s time to delve into fixing this pesky problem.

3 Reasons Why Your Toilet Tank Leaks When Flushed

Toilet tanks may leak post-flushing due to a variety of reasons. Let’s break it down to three primary culprits:

  1. Worn-out Flapper: The flapper creates a seal within the tank. Over time, this rubber component can wear out or become warped, failing to form a solid seal. As a result, water continually leaks into the toilet bowl.
  2. Faulty Fill Valve: The fill valve controls the water level within the tank. If it’s malfunctioning, it could cause an overflow of water, leading to leaks.
  3. Broken Tank-to-Bowl Gasket: The gasket is the large seal that connects the tank to the toilet bowl. If this gasket has cracks or other damage, water will leak out whenever you flush it.

Remember, consistent leaks increase your water bill and can result in a significant amount of water damage in your bathroom, so acting promptly is crucial for your wallet and home’s health.

How to Fix a Toilet Tank That Leaks After Being Flushed in 6 Simple Steps

Fixing the toilet tank that leaks post-flush is comparatively easier than you think. Here’s a simple step-by-step guide to help you out:

Step 1: Shut Off the Water Supply

First things first, locate your toilet’s shut-off valve. It’s typically found on the wall behind the toilet. Turn it clockwise to cut off the water supply to the toilet.

Step 2: Empty the Tank

Flush your toilet to empty the tank. This step ensures that you can work on the toilet without any water getting in your way.

Step 3: Check the Flapper

The flapper is the rubber component that creates a seal within the tank. If it’s worn out or warped, it might be the culprit. If so, replace it with a new one you can find at any home improvement store.

Step 4: Examine the Fill Valve

The fill valve controls the water level in the tank. If it’s faulty, it could lead to an overflow and subsequent leaks. You might need to replace this with a new one, too.

Step 5: Inspect the Tank-to-Bowl Gasket

The tank-to-bowl gasket is the large seal that connects the tank to the toilet bowl. If there are any cracks or damages, replace it to prevent any leaks.

Step 6: Turn On the Water Supply

Once you’ve replaced the faulty components, turn the water supply back on. Monitor the toilet for any signs of leaks.

Congratulations! Now you know what to do if your toilet leaks when flushed from the tank. If you have any further questions about the process, don’t hesitate to reach out to one of our team members at Full Speed Plumbing.

What Are the Risks Related to Leaky Toilet Tanks?

If your toilet leaks from the tank when flushed, you should address the issue as soon as possible. Leaky toilet tanks can pose several risks, both immediately and over time. Here are some of the potential hazards:

  1. Increased Water Bill: Over time, water leaks can waste a surprising amount of water and lead to a noticeable spike in your water bill. This is essentially money going down the drain without you utilizing the services you’re paying for.
  2. Environmental Impact: Water wastage is a grave concern in an era of increasing environmental consciousness. Every drop of water that leaks from your toilet tank is a drop that’s not being put to good use. This cumulative wastage contributes significantly to water scarcity issues.
  3. Potential for Water Damage: If your toilet leaks between the tank and bowl when flushed, it can lead to serious water damage in your bathroom. This includes discolored tiles, mold, mildew, and even rot in wooden subfloors. These affect the aesthetic appeal of your restroom and can lead to costly repairs and health issues.
  4. Underlying Plumbing Issues: A leaky toilet tank may be a sign of more severe plumbing issues. It may indicate problems with your home’s plumbing system that could lead to more significant leaks or water damage if left unchecked.
  5. Unpleasant Odor: Persistent dampness due to a leaky toilet can create an unpleasant odor in your bathroom. This smell can permeate other areas of your home, contributing to an overall less enjoyable living environment.

Remember, it’s best to address these issues promptly to prevent more costly repairs down the line. 

Can You Call a Plumber to Fix Your Leaky Toilet Tank?

Absolutely! 

The DIY process isn’t everyone’s cup of tea, and that’s perfectly okay. If you’re apprehensive about tackling the leaky toilet tank issue, it’s highly advisable to call a professional plumber. They have the expertise and tools to complete the job efficiently and correctly, saving you time and potential frustration. 

After all, ensuring that your home’s plumbing is functioning to its full potential is critical to maintaining your home’s health and peace of mind. At Full Speed Plumbing, we’re always just a phone call away, ready to address your plumbing needs.

Toilet Tank Leaks When Flushed: How to Fix — Conclusion

In conclusion, a leaking toilet tank is not just an annoyance, but it can lead to significant water wastage, environmental impact, potential water damage, and even underlying plumbing issues. It’s crucial to act promptly to curb these issues. 

If DIY isn’t your style, don’t worry. Full Speed Plumbing is here to help. Our team of experts is always on call, ready to assist with your plumbing needs in Mount Vernon, WA. Don’t let a leaky toilet disrupt your peace of mind. 

Contact Full Speed Plumbing today, and let us ensure your home’s plumbing is functioning at ‘full speed’.

How to Fix A Water Heater Pilot Light That Won’t Stay Lit

Encountering a faulty water heater pilot light can be a frustrating experience, especially when you’re looking forward to a warm shower after a long day. However, this issue is more common than you might think, and with a bit of guidance, it’s something you can often resolve on your own. 

In this blog post, we’ll take you through the essential steps to fix a water heater pilot light that won’t stay lit. 

So grab your toolbox, and let’s bring back the warmth to your water heater! Afterward, check out this blog post if you’d like to learn some of our top plumbing tips to try this summer.

What is a Water Heater Pilot Light?

The pilot light is a critical component of your water heater. Think of it as the little flame that could – small but mighty! This tiny flame springs into action when you turn on your water heater. It ignites the burner, which in turn heats the water. That’s how you get those delightful warm showers on chilly mornings.

This flame deserves a gold star for reliability because it’s always on, even when your water heater isn’t actively heating up water. It’s stationed right below your water heater’s gas control knob, keeping things warm and ready for when you need hot water.

However, if this persistent little flame goes out, it can’t light the burner, and your water heater falls short of its one job – providing you with hot water. That’s why keeping an eagle eye on your pilot light is crucial.

Fixing a Water Heater Pilot Light That Won’t Stay Lit

Here’s our step-by-step guide for dealing with a water heater pilot light that doesn’t want to stay lit:

Step 1: Ensure Your Safety First

Before you begin, it’s crucial to take safety precautions. Turn off the gas control knob on your water heater and wait for a few minutes to allow any residual gas to disperse. This will prevent any accidental ignition. 

Also, if you smell a strong scent of gas, leave the area immediately and contact your gas company. Safety is always the priority.

Step 2: Locate the Pilot Light

Next, you need to find the pilot light. It’s typically located right under the gas control knob on your water heater. You can often identify it by a small, clear viewing window or a removable cover. Remember, this little flame is the heart of your water heater.

Step 3: Relight the Pilot Light

Once you’ve located the pilot light, it’s time to relight it. Turn the knob on your water heater unit to the ‘Pilot’ setting. Then, press down on the button (also known as the ‘reset’ button) and light the pilot area using a long lighter or matchstick. Hold the button down for a minute, then release it. If the pilot light stays lit, you’ve successfully resolved the issue.

Step 4: Check the Thermocouple

If your pilot light keeps going out even after relighting, it could be a faulty thermocouple. The thermocouple is a safety device that shuts down the gas supply if it detects the pilot light is out. 

Check if it’s in the correct place – the tip should be in the pilot flame. If it looks badly worn or damaged, it may need replacement.

Step 5: Consult a Professional

Finally, if you’re still experiencing issues with your pilot light after following these steps, it might be time to call in a professional. 

While being a hands-on homeowner is undeniably rewarding, some things are better left to the experts to ensure safety and efficacy.

By following these simple steps, you can potentially save yourself a call to the plumber and get your water heater back in action in no time. Just remember, if things get too complicated, don’t hesitate to call in a professional, like one of our team members at Full Speed Plumbing. We can help you identify the reason why the pilot light on your water heater won’t stay lit and deal with the issue in a flash.

Maintaining the Pilot Light on Your Water Heater

The pilot light of your water heater deserves some TLC, as it’s the heart of your system! Here’s how you can keep it in top shape.

  1. Regular Inspections: Make it a habit of visually inspecting the pilot light. It should burn with a steady blue flame. If the flame is yellow or orange, it might indicate a problem.
  2. Keep the Area Clean: Ensure the area around the pilot light is clean. Dust and dirt can clog up the components, affecting the pilot light’s performance. Use a brush or canned air to gently clean the area without causing damage.
  3. Check the Flame Size: The pilot light should be about 1-2 inches in height. If the flame is too small, it may not heat the thermocouple enough to keep it lit. Refer to your water heater’s manual for instructions on adjusting the flame size.
  4. Monitor the Thermocouple: The thermocouple is crucial in keeping your pilot light on. Once in a while, check the thermocouple’s condition. If it’s worn out or damaged, it may need replacement.
  5. Annual Professional Checkups: While DIY maintenance can keep your water heater in good condition, annual checkups by a professional are advisable. They can spot potential issues early and ensure the system is working efficiently.

Remember, safety is paramount when dealing with appliances like water heaters. If the pilot light won’t stay lit on your water heater, don’t hesitate to consult a professional! 

By maintaining your pilot light, you’ll ensure a steady supply of hot water for those comforting warm showers.

How to Fix A Water Heater Pilot Light That Won’t Stay Lit — Conclusion

In conclusion, dealing with a faulty water heater pilot light can be a challenge. However, by following the steps outlined in this guide, you can attempt to troubleshoot the issue safely and effectively. 

Remember, it’s your water heater pilot light’s job to ensure that every shower you take is a warm delight. If the task becomes overwhelming or if the problem persists, professional help is just a phone call away. 

Our team at Full Speed Plumbing in Mount Vernon, WA, is always ready to step in, ensuring you’re never left in the cold. Don’t hesitate to contact us today for any water heater-related issues. 

Let us handle the heat so that you can enjoy the warmth!

How to Stop A Toilet From Overflowing: 5 Easy Steps

A toilet overflow is never a good thing. A toilet overflow can quickly turn a pleasant day into a stressful one.

But don’t worry! This guide will show you how to stop your toilet from overflowing. Follow our guide, and you’ll be able to control the situation quickly.

Remember, if you feel overwhelmed, our talented technicians from Full Speed Plumbing in Mount Vernon, WA, are only a phone call away. Our technicians are ready to provide professional, reliable plumbing services.

Let’s look at these steps, shall we?

5 Tips and Tricks That You Can Use to Stop Your Toilet From Overflowing

Are you tired of coming home to a soaked bathroom floor? Have you run out of temporary solutions to your plumbing problem? 

If you answered “yes” to either of our questions, you should make use of the following list of tips to learn how to stop toilets from overflowing:

Turn Off The Water Supply

The first step in stopping a toilet overflow is to turn off the water supply. There’s a valve typically located on the lower left side of the toilet. Turn it clockwise until the water stops. This prevents further water from entering the bowl.

Use a Plunger

A plunger can be a lifesaver to anyone who wants to learn how to stop a clogged toilet from overflowing. Place the plunger over the toilet’s drain hole and push down gently, then pull up sharply. The suction created can dislodge the clog that’s causing the overflow. 

Remember, it’s a process of trial and error!

Try a Toilet Auger

A toilet auger (also known as a snake) might be your next best friend if you want to learn how to stop a toilet from overflowing when clogged. Insert the end of the auger into the drain and turn the handle clockwise. The auger will break up or retrieve the clog, allowing water to drain.

Avoid Over-Flushing

You might think flushing repeatedly will help, but it can worsen the situation. Instead, wait for some time between each flush to allow the water level to go down.

Regular Maintenance

Regular maintenance can prevent toilet overflows before they happen. For example, avoid flushing items like wet wipes, cotton balls, or feminine products, as they can cause clogs. Also, routine professional inspections can detect potential issues early.

Why Do Toilets Overflow? — 5 Potential Causes

Toilets can overflow due to a variety of reasons, often turning a regular day into a plumbing nightmare. However, gaining a better understanding of these causes can help prevent such events from occurring.

Clogged Pipes

The most common cause of toilet overflow is a clog in the pipes. This can occur when unsuitable items, such as wet wipes or tampons, are flushed down the toilet. An example of this would be a family member accidentally dropping a toy into the toilet bowl and flushing it, causing an obstruction in the pipes and resulting in an overflow.

Blocked Vent Pipe

The vent pipe, also known as the plumbing vent, allows air to enter the plumbing system and equalize pressure. When this vent gets blocked – perhaps by a bird’s nest or debris – it can disrupt the flow of water and waste, leading to a toilet overflow. Imagine a straw with one end sealed – you can’t draw liquid up into it. The plumbing vent works similarly.

Faulty Fill Valve

Your toilet’s fill valve controls the amount of water in your toilet tank. A faulty or malfunctioning fill valve can cause the tank to overfill and subsequently overflow. For instance, if the fill valve is set too high, the water level in the tank may exceed the overflow tube’s height, leading to an overflow.

Sewer Line Problems

Issues in the sewer line, such as blockages or tree root infiltration, can also result in toilet overflows. If you’re experiencing frequent overflows and have ruled out other common causes, it might be worth investigating the condition of your sewer line.

Low-Flow Toilets

Although low-flow toilets are designed to conserve water, they are sometimes prone to clogs due to insufficient pressure. Imagine flushing an apple down a regular toilet compared to a low-flow toilet – the latter may struggle due to less water volume and pressure.

What Issues Are Caused By Overflowing Toilets?

Knowing how to stop toilets from overflowing is just half of the battle; homeowners should be aware that there are several risks associated with overflowing toilets, some of which include the following:

  1. Health Risks: Water overflowing from toilets may contain harmful pathogens and bacteria, like E. coli, that can cause serious illness if improperly handled. E. coli bacteria can cause vomiting and diarrhea if ingested.
  2. Property Damage: A toilet overflow can cause damage to your home. This is especially true if the overflow does not get addressed immediately. If the water seeps through the floor, for example, it can damage the flooring or even the structure underneath, resulting in costly repairs.
  3. Electrical Risks: Overflowing water from a toilet can contact electrical outlets or appliances and cause electrocution. If your bathroom has a floor-mounted electrical outlet and your toilet overflows, the water may reach the outlet, creating a potentially dangerous situation.
  4. Environmental Risks: If wastewater from your home is discharged into the local environment instead of the sewage system, this can pollute the local water sources. This can harm wildlife and spread disease.

How to Stop A Toilet From Overflowing: 5 Easy Steps — Conclusion

In conclusion, dealing with an overflowing toilet doesn’t have to be a nightmare. Armed with knowledge and the right tools, you can swiftly manage such situations. 

Remember, turning off the water supply, using a plunger or toilet auger, avoiding over-flushing, and maintaining regular upkeep can go a long way in preventing toilet overflows. It’s crucial to be aware of potential causes like clogged pipes, blocked vent pipes, a faulty fill valve, sewer line problems, and the peculiarities of low-flow toilets. 

However, if the issue persists or feels too overwhelming, don’t hesitate to reach out. The experts at Full Speed Plumbing are always ready to provide professional, reliable plumbing services. Contact us today for any toilet-related issues and give yourself the peace of mind you deserve.

Common Causes Of Fluctuating Water Pressure

If you’ve ever been in the middle of a relaxing shower only to be jolted by a sudden change in water pressure, you’re not alone. Fluctuations in water pressure are a common issue in many households and can transform a soothing bath time into an unpredictable adventure. 

While it’s easy to dismiss these fluctuations as a minor inconvenience, they often indicate underlying issues in your plumbing system that require attention. In this blog post, we’ll delve into the potential reasons why your water pressure is fluctuating, helping you understand what might be going on in those pipes behind your walls. 

Buckle up, because we’re about to embark on a journey through the unseen highways of your home’s plumbing system!

Encountering fluctuating water pressure in your house? Don’t just brush it off – it could indicate something more serious in your plumbing system. 

Let’s get it sorted! 

At Full Speed Plumbing in Mount Vernon, WA, we’re experts at diagnosing and fixing fluctuating water pressure issues. 

Don’t let your tranquil shower be spoiled by unpredictable water pressure – reach out to us today. Your peace of mind is just a call away.

Why is Fluctuating Water Pressure an Issue for Homeowners?

Fluctuations in water pressure can pose quite a few challenges for homeowners. For starters, it can significantly impact the comfort of everyday tasks. The varying water pressure can make showers, washing dishes, or watering the garden an inconsistent and frustrating experience. 

Furthermore, it can lead to ineffective appliance operation. Many home appliances like dishwashers, washing machines, and sprinkler systems require a certain level of water pressure to function optimally. When this pressure isn’t consistent, it can lead to poor performance and even damage to these appliances over time. 

Lastly, if your water pressure is fluctuating, it may be a symptom of larger issues within your home’s plumbing system. It could indicate problems such as leaks, blockages, or even a faulty pressure regulator. These issues, if left unchecked, could lead to more serious damage, resulting in costly repairs. 

Hence, it’s important not to ignore fluctuations in your water pressure. Instead, consider them a call to action to inspect and address any potential issues in your plumbing system.

6 Potential Reasons Your Water Pressure is Fluctuating

The following list details some of the most common causes of fluctuating water pressure:

  1. Using your Water System During Peak Usage Times: Just like traffic on the road, your home’s water system can become congested during peak usage times. This typically occurs in the morning when most people are getting ready for the day and in the evening when everyone is coming home. These are the times when your home’s water system is under the maximum load, leading to temporary drops in pressure.
  2. Damaged Pressure Regulator: The pressure regulator is a crucial component of your home’s water system. It’s responsible for maintaining consistent water pressure throughout your home. However, if the regulator becomes faulty or isn’t adjusted correctly, it can lead to fluctuations in water pressure.
  3. Corroded Pipes: Over time, water pipes can become corroded and blocked, which can cause significant changes in water pressure. If your home’s plumbing system is old or hasn’t been serviced in a while, it’s worth getting a plumber to check your pipes.
  4. Leaks: Water leaks, whether big or small, can lead to changes in water pressure. Even a tiny leak can gradually lower your home’s water pressure, and a more extensive leak can cause a sudden and noticeable drop.
  5. Buildup of Minerals: Over time, minerals present in water can accumulate inside pipes, constricting the flow of water and causing changes in pressure. This is especially common in areas with hard water.
  6. Sharing Pipelines: If your home shares a water main with other homes, you may experience fluctuations in water pressure. For example, when your neighbors use a significant amount of water (like watering the lawn or filling a pool), it can temporarily lower your home’s water pressure.

Each of these causes can be addressed and resolved to restore consistent water pressure to your home. However, it’s important to enlist the help of a professional plumber to diagnose and fix these issues accurately and safely.

Can You Fix Your Water Pressure Problems By Yourself or Should You Call in the Pros?

Fixing water pressure problems might seem like a tempting DIY project for the handy homeowner, but it’s often a task best left to professionals for several reasons. 

First, plumbing systems are complex and intricate. An untrained individual might have difficulty identifying the precise cause of the pressure fluctuations and could potentially exacerbate the issue while trying to fix it. Missteps could lead to further damage, potentially increasing repair costs. 

Second, addressing some of these issues, such as replacing a faulty pressure regulator or dealing with corroded pipes, involves specialized tools and knowledge beyond a typical homeowner’s scope. 

Finally, working with plumbing systems can pose safety risks, particularly when dealing with older systems or those in poor condition. Engaging a professional ensures that these risks are managed effectively. Good plumbers have the training, tools, and experience to accurately, safely, and efficiently diagnose and resolve water pressure issues.

Common Causes Of Fluctuating Water Pressure — Conclusion

In conclusion, fluctuations in water pressure in your home can be more than a simple inconvenience — it’s often a sign of underlying issues in your plumbing system. 

From peak usage times and faulty pressure regulators to corroded pipes, leaks, mineral buildup, and shared pipelines, the causes are varied and require professional attention. Not only can these fluctuations impact the comfort and efficiency of daily tasks and appliance operation, but they can also signal larger, potentially costly issues in your plumbing system. 

While it might be tempting to tackle these issues yourself, handling complex plumbing systems without proper knowledge, experience, and tools can lead to further damage and potential safety risks. 

At Full Speed Plumbing, our trained professionals are equipped to diagnose and resolve your water pressure issues in Mount Vernon, WA and the surrounding areas

Don’t ignore your water pressure issues — contact us today for a thorough inspection and timely resolution.

Why Does My Toilet Keep Clogging?

Toilets are some of the most important fixtures found within a home, as they handle waste products and keep you and your beloved family healthy. While toilets can process large quantities of both solid and liquid waste, they sometimes clog. Toilet clogs can occur for any number of reasons, yet they’re always very frustrating to deal with, and so many homeowners ask, “Why does my toilet keep clogging?”

We find that toilet clogs are some of the most common causes of plumbing repair in Skagit County and that they happen for many different reasons. In this guide, we’ll explain how toilets work, why they suffer from clogs, and the critical importance of working with professional experts to fix clogged toilets.

How Do Toilets Work?

Before identifying why toilets clog, it’s best to understand how toilets operate. These systems are more complicated than many assume. Toilets rely on many pieces, such as a bowl, toilet trap, piping, and more.

Pressing your toilet’s handle activates the flushing mechanism and sends water rushing into the bowl, expelling waste into the toilet trap and beyond, all the way into your home’s piping. Most clogs occur in either the toilet trap or the pipes.

5 Reasons Why Toilets Clog

Toilets of all shapes, sizes, and brands are at risk of clogging. However, if you take proper care of your toilet and perform regular maintenance, you may be able to avoid more serious complications that would otherwise cause immense stress. It’s best to search for plumbing repair in Mount Vernon, as our trained professionals can fix any clog. Below are five common reasons why toilets clog:

  • Toilet Trap Clog
  • Flushing Non-Flushable Products
  • Too Much Toilet Paper
  • Older, Low Flow Toilets
  • Pipe Problems

Toilet Trap Clog

As stated, one of the most vital components of a toilet is the toilet trap. This S-shaped passageway functions to stop solid items from traveling deeper into your plumbing system before they damage your home’s pipes. It does its job well but can become clogged at a moment’s notice.

There are excellent DIY methods you can use to fix a toilet trap clog. Use a toilet plunger to dislodge any material within the trap, or if that doesn’t work, consider purchasing a toilet auger. However, some tough clogs might require professional plumbing assistance; the experts have the equipment and know-how needed to tackle even the toughest toilet trap clogs.

Flushing Non-Flushable Products

All too often, adults and children alike flush items that don’t belong in a toilet. Wet wipes, tissues, hygiene products — even if the packaging says that these items are flushable, they are not. Non-flushable products will become stuck within your toilet’s trap or perhaps even deeper within your pipes.

A good rule of thumb to follow is to only flush toilet paper and waste products. Any other items belong in the garbage. Our professional plumbers can help you remove any pesky debris from your toilet by using state-of-the-art equipment, ensuring optimal performance.

Too Much Toilet Paper

We find that many homeowners assume that they can use as much toilet paper as possible, as they are under the impression that it’s entirely flushable. While you can and should flush toilet paper, excess material can still clog your toilets. Multi-ply or thick toilet paper causes serious problems, in particular.

Be reasonable with how much toilet paper you use. Purchase single-ply paper, and fold it to reach your desired thickness. Most of all, if you’re struggling with a nasty clog, use a plunger or call for professional help as soon as possible.

Older Low-Flow Toilets

Many years ago, toilet manufacturers recognized the importance of reducing water consumption per flush. To help improve sustainability, they developed low-flow toilets; while modern low-flow toilets operate with impeccable efficiency, older models often struggle to handle waste, as they lack the proper pressure needed to process waste.

A quick fix for low-flow toilet issues involves using less toilet paper. However, we believe that homeowners who own older low-flow toilets should upgrade their fixtures to prevent clogs. Expert plumbing contractors can install a new unit that balances performance with water conservation.

Pipe Problems

Many homeowners who ask, “Why does my toilet keep clogging?” fail to consider the possibility that their home’s pipes are to blame for their troubles. Your toilet itself might work flawlessly, but without clean, efficient pipes, you can still experience severe clogs. Minerals, along with fats and greases, can accumulate inside pipes, preventing effective water flow.

We recommend that homeowners with serious pipe issues work with a plumbing service to either clean or replace their pipes in Mount Vernon, WA.

Why Call A Professional for Clogged Toilets?

Clogs can form for any reason and at any time. As you now understand, placing the wrong waste products down the drain, using too much toilet paper, or one of many other issues can prevent your toilet from working properly. It’s crucial that you call for professional help as soon as you notice a problem, since they can help address the problem effectively.

Specialized Expertise

DIY plumbing care can work in some situations. However, there are many plumbing issues, such as sewer line problems, that require professional attention. The right plumbing experts possess the experience and tools needed to handle these complicated problems; you simply can’t fix some plumbing problems on your own.

Preventative Service

Plumbers take a holistic approach to toilet problems. They want you to have toilets that you can rely on, no matter what. By working with toilet professionals, you can identify and treat potential problems before they cause more severe issues.

Expert Plumbing Services In Mount Vernon, WA

Full Speed Plumbing provides expert plumbing services in Mount Vernon, WA. We’re local professionals with a passion for helping our community. You can relax knowing that our contractors have what it takes to handle any plumbing issue. If you’re still asking, “Why does my toilet keep clogging?” or if you have any other plumbing concerns, call us at (360) 610-7901 today!

8 Tips to Prepare Your Plumbing for Summer

Summer in Mount Vernon, WA often means an increase in activity and guests around your home. It also means you’ll likely experience a jump in your water usage. Whether you’re doing more loads of laundry, running your sprinklers, or filling up an outdoor pool, you want to make sure you prepare your plumbing system.

At Full Speed Plumbing, we understand that many people don’t think about thoroughly checking all the different aspects of their plumbing before the warmer months arrive. In this blog, we describe how the following eight ways can keep your plumbing system clear and working smoothly all summer long.

  • Inspect Your Sump Pump
  • Service Your Hot Water Heater
  • Clean Your Gutters
  • Be Aware Of What You Put In Your Garbage Disposal
  • Check Your Sprinkler System
  • Inspect Hoses And Valves
  • Check Hose Bibs & Spigots
  • Check Your Washing Machine

Inspect Your Sump Pump

The Pacific Northwest is no stranger to frequent rain, which is why sump pump care is an essential part of plumbing maintenance in Mount Vernon, WA. If the weather forecast calls for a dry day, that’s the perfect time to test your sump pump to ensure it’s up to the task of keeping your home from flooding during a rainstorm.

To perform a DIY test, ensure your sump pump has power. Clear out any leaves or debris that may block the intake valves. Next, pour a bucket of water into the pump. If it’s working properly, it should turn on and start processing the water within 10 seconds. If it runs slower than that, you may need to look at calling a Full Speed professional for plumbing maintenance or repair in Skagit County, WA.

Service Your Hot Water Heater

Many people don’t know that they need to drain and inspect their hot water heater periodically. Over time, the buildup of sediment and other debris in your water heater may reduce the efficiency of the unit and increase your energy bills.

Summer is the perfect time to drain and inspect your water heater, as there’s no risk of freezing. Additionally, if you do need to schedule an appointment for plumbing maintenance or repair in Alger, WA, you may get your water heater serviced more quickly due to less demand for water heater fixes in the warmer months.

Clean Your Gutters

While gutter cleaning may not seem like a plumbing issue, clogged gutters may potentially cause drainage problems and flooding. Leaves, branches, twigs, or other tree debris may jam your gutters and keep them from doing their job properly. Clogged gutters and downspouts keep water from moving away from your home, causing flooding, standing water, or damage to the siding and structure of your home.

Be Aware Of What You Put In Your Garbage Disposal

Entertaining friends in the summer means more wear and tear on your garbage disposal. Skin from prepping fresh fruits and vegetables often gets caught in the disposal and causes it to seize up. Well-meaning cleanup helpers may put greasy or large pieces of food or bones in the disposal, also causing blockages. Make sure you have large, clearly marked garbage cans, and let guests know not to overuse the garbage disposal.

Another way to help prevent plumbing problems in the summer is by scheduling professional drain cleaning. While you may think treatment with household drain cleaners is enough, be aware that chemical drain cleaners damage your pipes.


Related Article: What To Avoid Putting Down Your Kitchen Sink


Check Your Sprinkler System

As you turn on your sprinkler system for the summer, it is important to make sure it’s working properly. Ensure all sprinkler heads pop up as they should and that they’re clean and free of clogs. Look for leaks or spots with too much or too little water. If you discover a problem with your sprinkler system needing a fix beyond your expertise, it’s time to call in professional plumbing repair or maintenance in Sedro-Wooley, WA.

Inspect Hoses & Valves

Due to summer not posing a risk for frozen pipes, sometimes we don’t give old valves or loose hoses much thought. However, if you have a loose hose or faulty connection, you run the risk of flooding. Check each hose, inside your home and out, and make sure they’re fitted tightly. Go through your home and turn all your valves on and off, including your water main and toilet valves. We encourage homeowners to check and make sure each is easy to turn and free of leaks. If you discover a loose hose or faulty valve, make an appointment for plumbing repair in Mount Vernon, WA.

Check Hose Bibs & Spigots

Inspect your outdoor faucets to make sure they turn on and off easily and aren’t rusty or worn out. Hose bibs (faucets that attach to hoses) and spigots (faucets that attach to pipes) experience various weather conditions all year long, so it’s essential to ensure they’re in good condition.

Check Your Washing Machine

Laundry never seems to end, especially during the summer when active people spend time outdoors getting dirty and sweaty. Before excess clothing and grime take over your laundry routine, inspect your washing machine to make sure it’s working at peak efficiency. Ensure that the hose is in good condition and attached tightly to the water supply, and repair or replace any damaged parts.

Full Speed Plumbing | Mount Vernon’s Plumbing Experts

At Full Speed Plumbing, we pride ourselves on providing our customers with prompt, reliable service and exceptional workmanship. Our fully licensed and insured team of experts has years of experience and the capabilities to work on everything from the smallest leak to a large plumbing installation.

We offer plumbing installation, repair, and maintenance of every type for your home. Whether you need water treatment solutions, drain cleaning, or to move or install a gas line, we’re here to help. Our 24/7 emergency plumbing services in Mount Vernon, WA ensure that you’re taken care of 365 days a year, no matter the time of day or night. We also offer various specials designed to make high-quality plumbing installation, repair, and maintenance more affordable and accessible to everyone.

If you’re looking for plumbing in Skagit County, WA, and the surrounding areas, look no further than family-owned and operated Full Speed Plumbing. Call our expert team today at 360-610-7901 to schedule an appointment.

What To Avoid Putting Down Your Kitchen Sink

It is easy to resort to putting extra food or substances down your kitchen sink, especially in a hurry. However, there are a variety of items your kitchen sink can not withstand. Putting just anything down your sink can create quite a mess and lead to expensive repairs, as well as other negative impacts. In this article, we discuss certain items to avoid putting down your kitchen sink in Mount Vernon, WA and the damage each can cause.

8 Things To Not Put Down Your Sink

Unfortunately, your garbage disposal can’t handle a handful of food related items either. It is important to pay attention to which items go down the drain, because some things can lead to clogs and sink repairs. While we love to visit with our customers, we hope it isn’t due to an uncomfortable and stressful situation with your plumbing! Below are eight things to not put down your kitchen sink in Pierce County, WA and surrounding areas.

  • Coffee Grounds
  • Pasta & Rice
  • Eggshells
  • Grease & Oils
  • Dairy Products
  • Paint
  • Fibrous Vegetables
  • Flour

Coffee Grounds

Many homeowners are aware that coffee grounds should never go down the sink, but are unsure as to why. Coffee grounds should always be put in the trash can or naturally recycled, because the grounds clump together in the presence of water rather than separating. Eventually the grounds will build up in your kitchen drain and lead to a smelly, costly kitchen sink clog in Mount Vernon, WA.

Pasta & Rice

Contrary to popular belief, you should not put pasta or rice down your sink. No matter if pasta or rice is cooked or uncooked, both textures can create problems for your sink and drainage system. When uncooked, both pasta and rice expand in your drain and create a blockage. When cooked, putting pasta and rice down your kitchen sink can create a thick paste once crushed by the garbage disposal. Both uncooked and cooked pasta and rice can lead to sink clogs and a damaged garbage disposal, and we recommend disposing of the food items in the trash can from now on.

Eggshells

When baking or cooking, it is easy to throw eggshells in the sink rather than attempting to open your trash can. However, eggshells can create some serious kitchen sink problems in Pierce County, WA and should always be thrown in the trash or removed from the sink after cooking.

Grease & Oils

When grease and oils are hot, they can seem like any other liquid that would go straight down the kitchen sink. However when the temperature lowers within grease and oils, it solidifies and can form a clog. When cool, the grease consistency resembles a butter texture. If grease or oil solidifies within your kitchen drain or sewer line, it creates a blog that is extremely difficult to remove. The blockage can result in a costly sink repair and unclogging service.

Dairy Products

When milk expires, your first thought may be to pour it down the drain and recycle the container. However, pouring milk and other dairy products down your kitchen sink is actually causing more harm than good to the environment! The process of breaking down milk and other dairy requires a significant amount of oxygen, which deprives necessary oxygen from living things that need it. Essentially – pouring milk and other dairy products down the drain in Snohomish County, WA and surrounding areas can suffocate water life, such as fish.

Paint

Just because it’s a liquid, does not mean it should be poured down the drain! When disposing of paint, you should never put it down your kitchen sink due to the drain and environmental problems it can cause. Paint can coat your drains and create clogs, damage your septic system, and pollute the groundwater supply and environment. If the paint is oil based, take it to an appropriate disposal drop-off site due to the hazardous materials it contains. Other paints we recommend drying out and putting in your garbage.

Fibrous Vegetables

The kitchen sink is an easy way to dispose of cooking scraps, but be sure to pick our certain ingredients before letting them go down your drain! Carrots, celery and other fibrous vegetables should not be put down your kitchen sink due to the damage it can cause to your garbage disposal. The scraps can get caught in the disposal blades and lead to food build-up. This can create bad odors and a potential sink clog!

Flour

Similar to pasta and rice, flour can cause a nasty clogged drain and headache for homeowners. Flour mixed with water can stick to the sides of your pipes and eventually lead to a sink clog. We recommend avoiding putting flour in your sink to keep it working effectively!

Your sink is an important part of your kitchen, and it is important to keep it in good condition for your comfort and convenience! If you take care of your plumbing, it will take care of you in return. However, kitchen sinks can clog from time to time even if you think you are taking the best care of it! For kitchen sink clogs or other plumbing services in Mount Vernon, WA and surrounding areas, give the experts at Full Speed Plumbing a call for speedy repairs!

Request Service